If you are searching for answers to the following questions, then you’ve come to the right place.
Is there any simple ways to transfer:
The videos I recorded on my iPhone X to Macbook air?
Britney Spears’ music video from my iPhone 6 to Mac?
The Avengers in my iPhone 8 to Mac?
… …
You may have the above or other similar problems now and then. Perhaps it is because you want to find an alternative for iTunes or the tool you use at the moment doesn’t really work out. For whatever reasons, you must be desperate for a handy tool or an effective solution at the moment to copy video from iPhone to Mac.
Three Ways to Move Video From iPhone to Mac
Method One: Using ApowerManager
This particular phone manager aims to simplify the process of transferring various kinds of files of iOS/Android to Windows, Mac or other mobile devices and vice versa. As regard to the file category, it covers music, photos, contacts, VIDEO and so forth.

Steps to export video from iPhone to Mac are as follows:
- Download and install this phone manager on you Mac.Download
- Connect your iPhone to ApowerManager with a USB cable or through the Wi-Fi network.
- Once connected, click “Manage” on the menu first.
![click the manage icon]()
- Click “Videos” on the left panel.
![click the videos icon]()
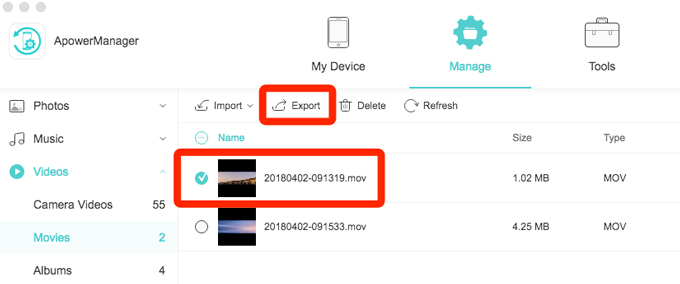
- Check the video file you want to transfer and click “Export”.
![check and export video]()
Method Two: Using AirMore
This is a professional mobile device management tool on the web and it allows you to transfer video from iPhone to Mac without iTunes, or even better, with/without USB and network. Besides videos, you can also enjoy copying any other media files to your Mac. To achieve that, just follow below steps:
- Download and install the app onto the iPhone.
- Open the browser on Mac and launch AirMore’s connecting page.
- Open the app on the iPhone and connect your device to AirMore by scanning the QR code or using the radar searching function on the connecting page.
- Once connected, click the “Video” icon on the left side menu.
![click videos icon button]()
- Check the video file you want to move and click “Export”.
![click export icon button]()
Method Three: Using AnyTrans
Similar to ApowerManager, it is also a convenient phone manager whose management area covers all your device data and media files. However, there is one distinct difference: AnyTrans has two separate versions for iOS and Android users respectively. Thus, for iOS users, be sure to download the correct version. Now, let’s check out what processes you need to copy video from iPhone to Macbook.
- Download and install this app on your Mac.Download
- Connect your iPhone to AnyTrans through a USB cable.
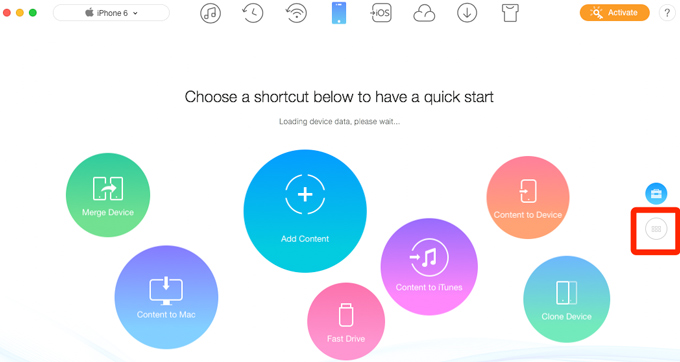
- Once connected, click the “Transfer by Category” icon on the right menu.
![click the menu button]()
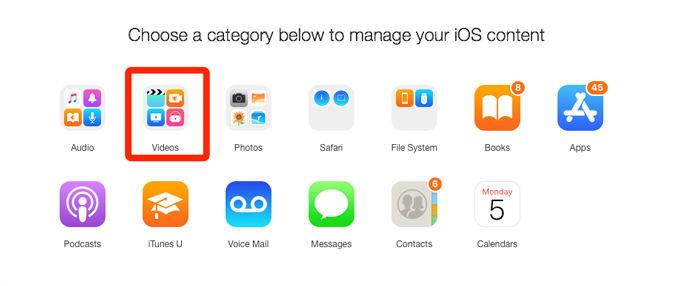
- Click the “Videos” category.
![enter videos category]()
- Once the videos’ categories are shown, choose the one you want to manage. Here we take “Movies” as example. Click “Movies”.
![click movies icon]()
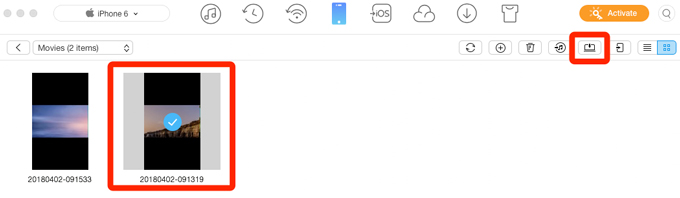
- Choose the video you want to export and click the “Send to Mac” icon at the top right menu.
![click send to mac button]()
Generally, the above methods include all the three recommended apps for you to transfer video files from iPhone to Mac. If you are looking for an extremely professional phone manager, you may choose between ApowerManager and AnyTrans, but if you prefer connecting the device wirelessly, then you may select AirMore instead. Actually, these methods can also be applied in transferring music or any media files you want. Anyway, hope you can find the best fit among these three amazing tools and happy transferring!
FAQ:
In daily usage, you may use more functions beyond the video transferring of the app. Therefore, other kinds of issues may appear in the process of your operation.
To find more solutions, please refer to the below guides:

Leave a Comment