
Apple is known for developing phones that are capable of taking good quality pictures. Many people prefer using iPhone over recent phones that enable you to capture high-quality pictures. As we all know, high-quality pictures consume too much space in your phone’s memory. In some cases, you may want to transfer photos on your Windows 10. With that, you can free up some storage and capture more memorable events. However, if you use iTunes to transfer photos, it will slow down your PC as it consumes a great deal of your system RAM. Being that said, here are convenient ways how to copy photos from iPhone to Windows 10.
Best Way to Transfer iPhone photos to Windows 10
ApowerManager

ApowerManager is a free file managing software that can help you transfer photos from your phone to computer and vice versa. It allows you to import, export, delete, transfer, and organize your files and other documents. With the help of this tool, you can back up your important photos and data, such as contacts and messages on your computer. By using this program, you can save your photos on your computer as backup and restore them anytime and download photos from iPhone to Windows 10. Aside from its capability to back up and restore all your data, you can use this to mirror your phone screen on PC using USB cable or wirelessly on a larger screen. You can take screenshots and record your phone screen from computer. To utilize this app, simply follow the steps below:
- Download and install the application on your computer and mobile device.
- Connect your iPhone on your computer via USB Cable. When a window pops up on your device, tap the “Trust” button.
- Make sure you have your iTunes on your computer to sync your iPhone and wait until your device is connected.
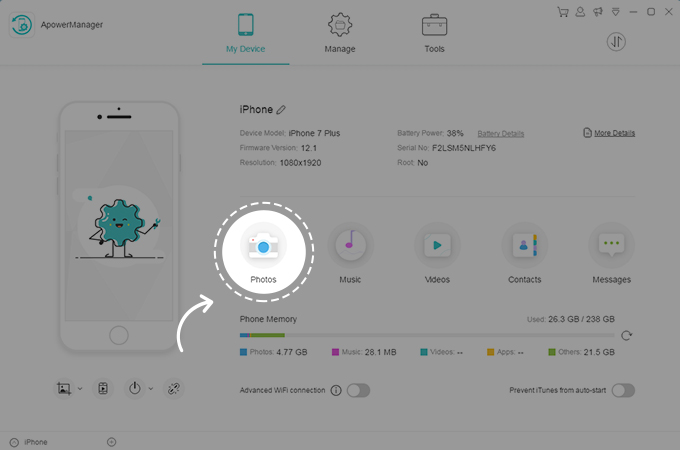
- From “My Device” tab, hit the “Photos” button.
![Click Photos button on ApowerManager]()
- After that, you will be directed to the “Manage” tab, which will enable you to select and import iPhone photos to Windows 10 PC. Tap “Export” and your photos will be automatically saved on your computer.
![Save iPhone photos in PC using ApowerManager]()

Windows 10 Photos App
The second way to transfer iPhone photos is through the use of the Photos App by Windows 10. This is a built-in application developed by Microsoft after they decided to make an all-in-one program that can organize, view, and edit photos all together. You can find the program in your Windows 10 PC by typing “Photos” on the search bar menu. This app enables you transfer photos from your phone in large quantity. To use the default photo viewer to copy photos from iPhone to Windows 10, here are the steps:
- Plug in the USB Cable on your computer and iPhone to connect.
- From your phone, there is a prompt where you have to select “Trust” to establish a successful connection from iPhone to computer.
- On the search bar of the Windows Start Menu, type “Photos” to find the Photos app on your PC.
- Click on the import icon of the interface located at the top-right side of the interface. From the options, select “From a USB device”.
![USB connect in Photos App]()
- Once done, select the photos you are trying to import and tap “Import selected” then pictures will be imported in Photos app.
![Selecting photos to import from iPhone to Windows 10]()


iCloud
Windows 10 is also capable of syncing your photos in iCloud wirelessly, provided you use iCloud to back up your pictures using your iOS device. This serves as a secured storage for your photos, videos, documents. It requires you to sign in your Apple ID and password on your PC that you used to set up your iOS device. iCloud gives 5gb storage free for every account, but you can choose to buy additional storage if there is no more space in your iCloud storage. To find out how to download photos from iPhone to Windows 10 using this app, here are the steps:
- Download iCloud on Windows 10, install then launch it on your computer.
- Enter your Apple ID and Password then click “Sign In”. A prompt will appear asking for a 6-digit verification code, which you can get from your iPhone device.
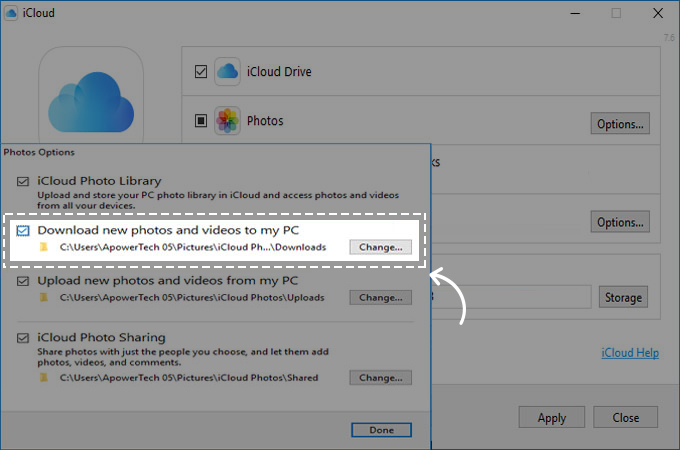
- From your phone, click “Allow” and then enter the 6-digit verification to iCloud and hit “Continue”. Then click the “Options” button next to Photos. From the Photos options, make sure “Download new photos and videos to my PC” is marked check. Then specify the download location where you want your photos to be saved. Do this by clicking “Change”, press “Done” then apply.
![Setup download location of photos]()
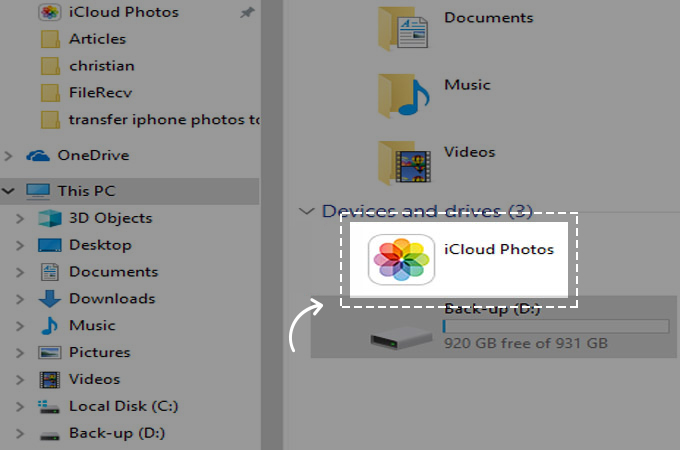
- From your folder manager, click “This PC” and tap “iCloud Photos”.
![Locate iCloud from This PC]()
- Press “Download photos and videos” located at the top left side of the interface. Select a folder and tap “Download”.
![Setup download location of photos]()

Conclusion
To sum it up, all these tools allow you to import your photos on your Windows 10 computer and have them handy on your computer whenever you need them. However, iCloud does not allow you to download all type of photos from your iOS device to your Windows 10 PC. On the other hand, ApowerManager gives you the freedom to transfer iPhone photos to Windows 10 in a fast and convenient way, letting you save more phone space.

Leave a Comment