Sometimes, as you browse the internet, you come across a very nice picture and save it on your computer. Moreover, if the picture is nice, you may want to use it as wallpaper for your iPad or any other gadget you have. Many Mac users think that it is not easy to transfer photos from Mac to iPad because apps that are compatible with Mac and iPad are limited compared with Windows and Android devices. Actually, there are apps that you can use to transfer them with great ease. Below are three of the best apps that you can use to transfer your photos from Mac to iPad.

How to Transfer Photos from Mac to iPad
Using ApowerManager
ApowerManager is a professional application which helps users to easily manage your phone, iPad or tab on your computer. This magnificent app is compatible with Windows, Mac, Android and iOS devices. In addition, you may import, export and delete files such as music, photos, videos and documents using it. You can also manage your iPhone with it. To fully understand how this tool works, here are the steps on how to transfer photos from Mac to iPad.
- Download ApowerManager on your Mac
- Launch the app on both devices and then connect your iPad to the computer using a USB cable.
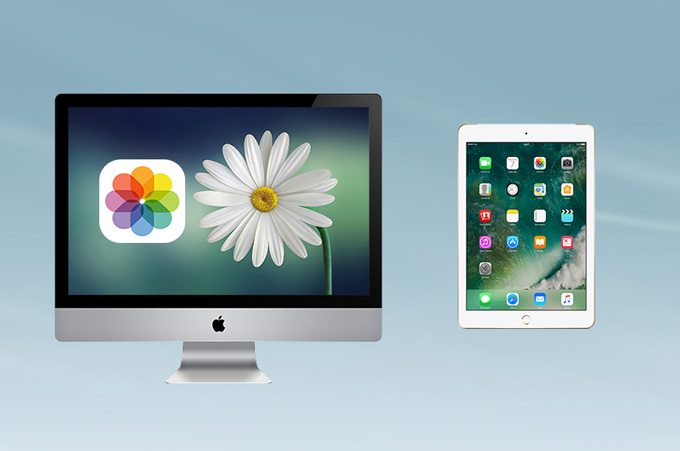
- Once connected, you may now start managing your files. For photos, just simply go to “Photos” and then click the “Import” button and then select all the photos that you want to get.
![Import Mac Photos]()

You can also repeat the same process with your other data using ApowerManager. Aside from that, this app can also let you mirror your screen, take a screenshot of your screen, power off your device, and even manage your iTunes back up.
Using AirMore
The next tool that you can use to move photos from Mac to iPad is AirMore. This is an online based application that lets you manage your iPad and other gadget’s device through a Wi-Fi connection. Actually, this app is so easy to use. You can import, export and delete files such as videos, music, documents and photos with it. Here is how you can use it.
- Install the AirMore app on your iPad.
- Visit AirMore’s page. Click “Launch AirMore Web to Connect” and you’ll be directed to a new window where you can choose between QR Code and Radar. For instance, we may use QR Code.
![Scan AirMore QR Code]()
- On your iPad, open the app and then click on “Scan to Connect.” Your iPad’s camera will then be opened.
- Scan the QR code using the iPad’s camera so you can connect.
- Once connected, go to “Pictures” and then click on “Import” to import photos into the iPad.
![Import Mac Photos via AirMore]()


Using AirDrop
Another wireless way that you can use to transfer files from Mac to your iPad is AirDrop. This is a built-in application on Apple devices that use Bluetooth LE to transfer files between Apple devices. Below are the steps on how to import photos from Mac to iPad with AirDrop.
- On Mac, go to “Finder” > “AirDrop”. Enable AirDrop by choosing either “Contacts Only” or “Everyone.”
![Airdrop on iPad]()
- On iPad, go to “Settings” > “General” > “AirDrop” > “Contacts Only” or “Everyone” to open AirDrop.
![Airdrop on iPad]()
- Simply drag the photos that you want to transfer into the avatar of the recipient.
![Drag and Drop to Transfer]()
- Click “Accept” on your iPad to save the photos.


Conclusion
Those are the three ways on how you can easily transfer photos from Mac to your iPad device. All the three ways are very useful. If you want a one-stop desktop app that is jam-packed with features, go with ApowerManager. However, if you want an internet-based app, use AirMore. On the other hand, if you want something that works like Bluetooth, just go with AirDrop.

Leave a Comment