
You have probably encountered this all-too-familiar situation: Imagine you have taken lots of photos on iPad and you want to transfer them from your iPad to your Mac. Then you will start to look for an excellent program to help you do this, but most of the time you’d be hard-pressed not to find a desired one. In actual fact, there are many programs that bring your iPad and Mac closer together. This post will list top 3 programs for transferring photos between iPad and Mac. If you want to know about the best programs available on Mac to transfer photos from iPad to Mac, you can check out this guide.
How to Transfer Photos from iPad to Mac?
Transfer iPad Photos with ApowerManager
If you prefer an easy connection between your iPad and Mac, you’ll want to try ApowerManager. ApowerManager is available on iOS and Mac. It allows you to transfer music, photos, videos, contacts, and documents, etc. between iPad and Mac. In addition to this, it features an intuitive interface, which full of organized icons and tools. Below are the step-by-step instructions you can follow to import photos from iPad to Mac.
- Install ApowerManager on your Mac and iPad by clicking the button below.
- Use a USB cable to link your mobile device with your Mac.
- Go to “Photos” tab, choose the photos you want to export and click on “Export” button.
![Transfer iPad Photos with ApowerManager]()

With ApowerManager, you can quickly move numerous photos from iPad to Mac, and you can manage apps, backup and restore data, and mirror screen from iOS devices to PC. It’s really the feature-rich app that well worth the installation.
Transfer iPad Photos with AirDrop
AirDrop is the built-in tool for iOS users. With AirDrop we can easily transfer files between apple devices, including iPhone, iPad, Mac computer and so on. If you have more than two Apple device, you will definitely love AirDrop. Below are the guide you can following to transfer photos from iPad to Mac.
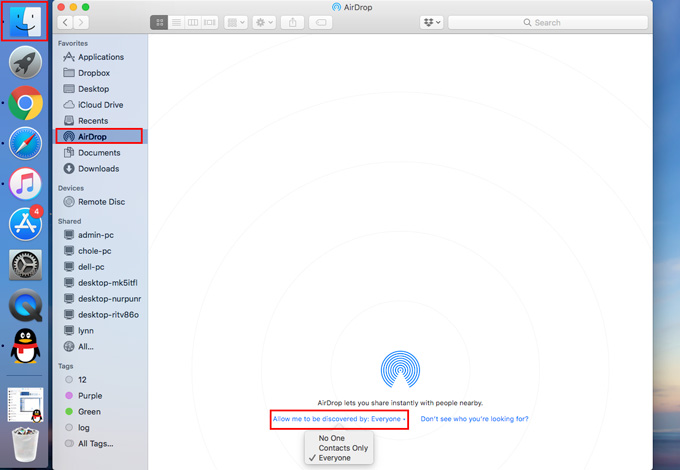
- Open Finder and click on “AirDrop” on your Mac. Enable AirDrop by selecting either “Contacts Only” or “Everyone”.
![AirDrop on Mac]()
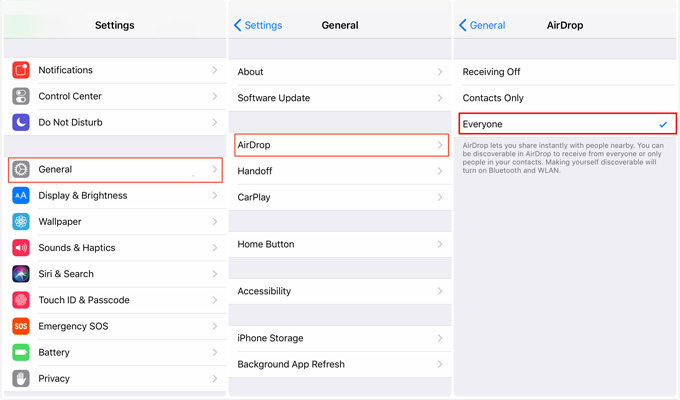
- Go to “Settings”> “General”. Enable AirDrop on your iPad by selecting either “Contacts Only” or “Everyone”.
![Turn on AirDrop]()
- Open Photos on your iPad, and select the photos you wish to transfer to your Mac.
- Select the Share icon at the bottom of the screen.
- Select your Mac from the list of devices that appear in the AirDrop section. The photos will automatically transfer to the download folder on your Mac.
Transfer iPad Photos with iCloud
Many people prefer to use iCloud because they want the photos to be synced immediately on their PC. However, there are also some people who don’t want to sign into their Apple account often. All in all, iCloud is relatively easy to use for beginners. Here is the guide of how to import photos from iPad to Mac with iCloud.
- On iPad, click on “Settings” and open “iCloud” to log in your account.
- Turn on “iCloud Photo Library” and related options.
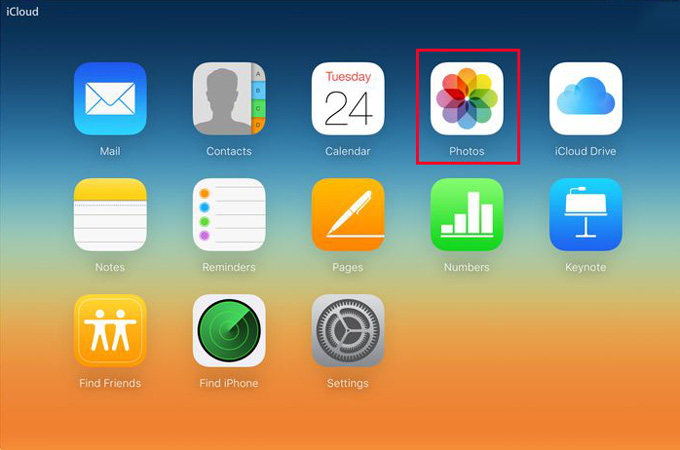
- Open iCloud on your Mac, and log in the same ID of iPad on your Mac. Then click “Photos”.
- Tap “Select Moment” to choose photos and click “Download” to transfer iPad photos to Mac.
Conclusion
The tools mentioned above are all easy to use. ApowerManager is the feature-rich program which can help you not only transfer photos from iPad to Mac but also mirror screen and manage other files on your iPad. AirDrop and iCloud are both useful tools for Apple users. Hopefully, this post provides a great option for you to move photos from iPad to Mac.

Leave a Comment