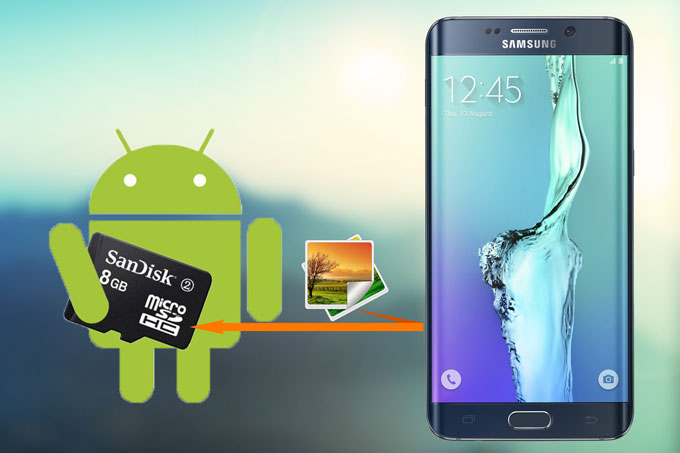
Currently Android phones have internal storage ranging from 1GB to 16GB. Android users usually expand the storage by inserting a SD Card into their handsets. With an increasing number of high-definition photos and other media files taking up the memory space of your mobile, the internal storage will be used up sooner or later. Therefore, people usually need to free up space by moving pictures to SD Card. Let’s look into the efficient tricks for how to shift photos from phone’s internal memory to a more spacious SD Card.
Easy Way to Move Pictures to SD Card
The particular steps on transferring your pictures to SD Card might vary a bit, but if you follow steps below, you can well save your precious photos taken in the travel or other places on computer for safe keeping and you also enjoy more flexibility to edit or share them.
1. Efficiently move your photos to SD Card
2. Directly move pictures to SD Card
Apowersoft Phone Manager – Efficiently move your photos to SD Card
This program is a versatile mobile management software available on the current market. It is widely used as a professional SD Card manager, with which users can swiftly transfer their photos to computer hard drive or external storage. Now you can get started with the guidance below to move pictures to SD Card on your Android phones.
Check this video to have a quick work around before learning the concrete steps.

- Download and install this phone manager on your computer.
- Open the program and connect your Android phone to PC with USB cable or via WiFi.
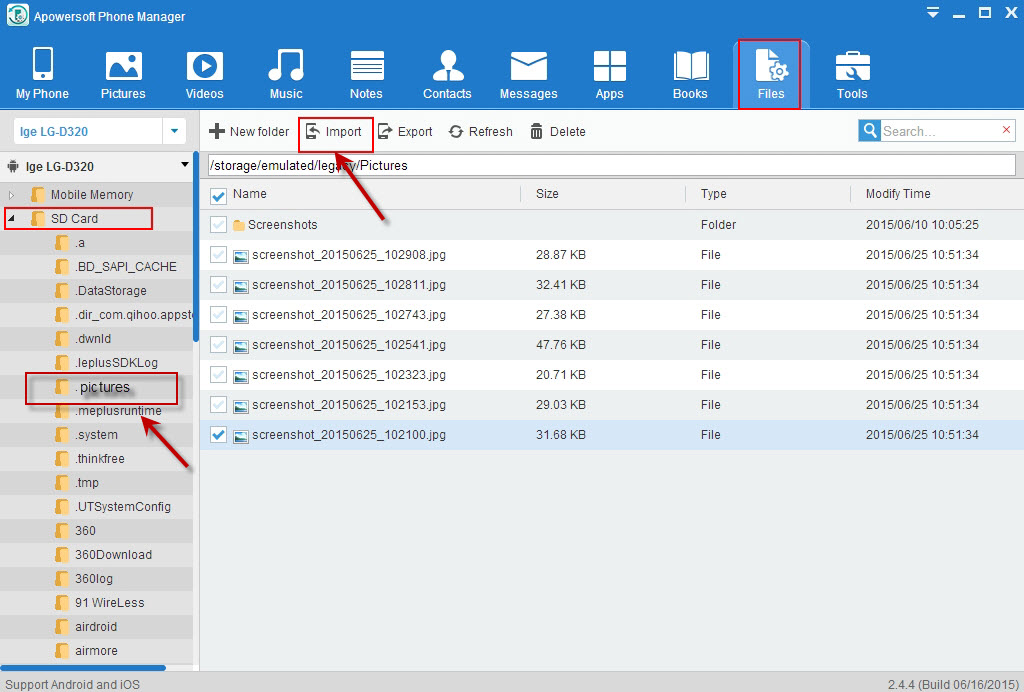
- Once connected, click “Files” and locate SD Card pane on the left side. Forward to “Pictures” folder and then hit “Import” button on the toolbar below top navigation to add photos to this folder. You can move photos to SD Card within a minute.
- Disconnect your Android device from computer by clicking “Disconnect” button.
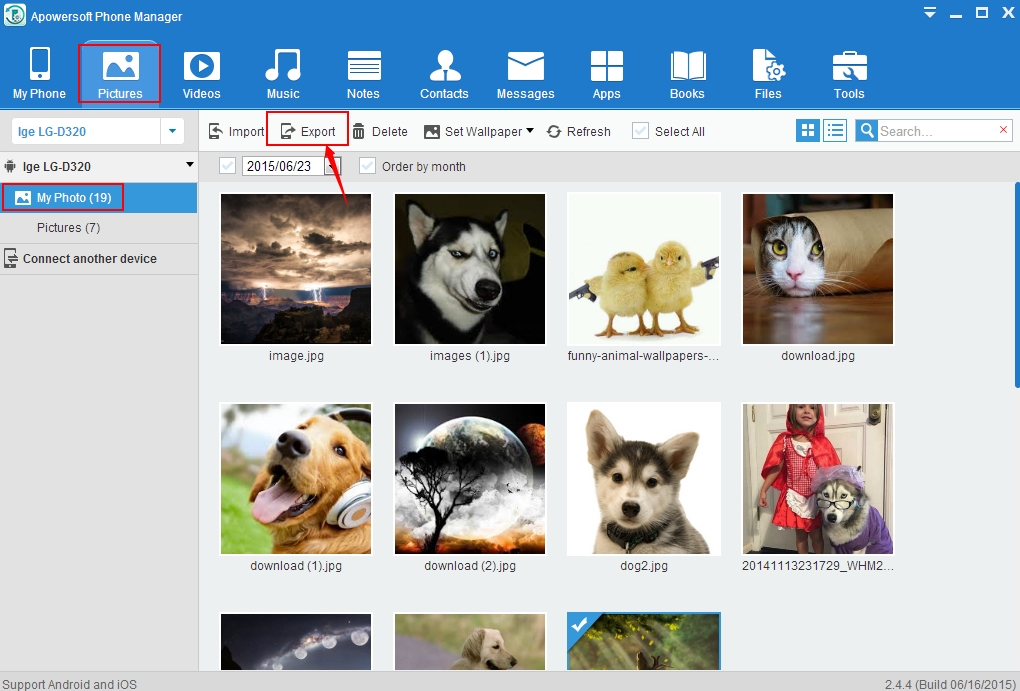
Despite transferring photos, you’re also allowed to manage them on your mobile by creating “New Folder”. If you don’t have enough space on your SD card, you can also move crucial photos to computer by clicking “Export” under the “Pictures” column. This phone manager is a comprehensive tool and enables you to make one-stop management for your SD Card.
Directly move pictures to SD Card
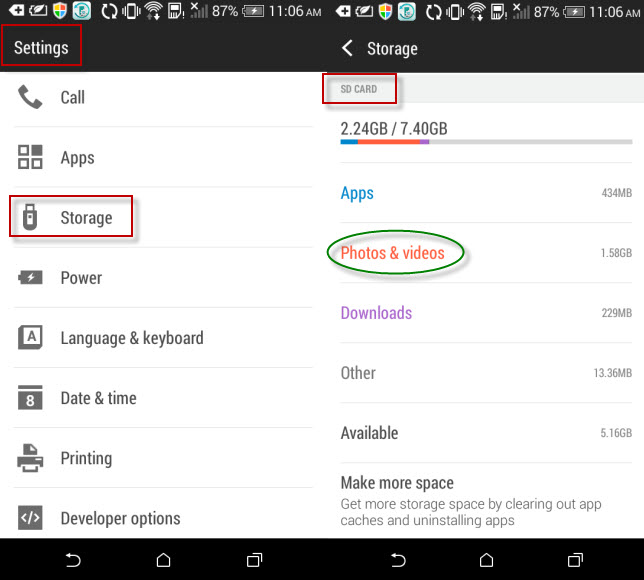
If you have already inserted a SD Card into your Android phone, you can directly save your photos to SD Card. Simple go to the “Settings” of handset and then find the “Storage” section, where Android displays the internal storage and SD Card information. Generally, Android phones have a file explorer app by default which enables you to access to the files and documents. Check it if your phone has such a program. If yes, open it and then go to the phone memory. Open the pictures folder, select the photos you want to transfer and tap the app’s menu to find “Move” option. Go to the SD Card and find the designated directory where you can transfer your photos. In this way, you can move photos to SD Card.
Comparison: The automatic way indeed transfers your photos under the background, but it deals with all photos as default and will inevitably store unwanted ones to your storage. The first solution seems more reasonable when taking this point into consideration.
Moving photos to SD card is an advisable method to save up your phone memory, but if you don’t have enough memory, you can also move them to computer. There are many other solutions on how to move photos to SD Card, but Apowersoft Phone Manager is highly recommended for its efficient performance and useful functions.

Leave a Comment