Apple manufactures the Mac which are faster and much reliable compared to the windows based laptops. You may at times need to share or store a particular session on your Mac screen and probably you don’t know how. In this article, I will show you how to take a snapshot about a part or the entire of your Mac screen. There are numerous ways to achieve this as stipulated below.
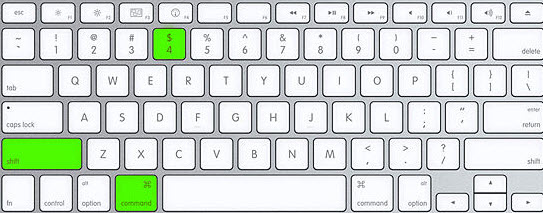
1. Using the print screen shortcuts (Command + Shift + 3/4)
This is the default method of screenshot on Mac and it does not require any foreign tool to be installed, probably the easiest. If you want to capture the entire screen, press “Command + Shift + 3” on your keyboard simultaneously where you will hear a shutter sound to indicate the screenshot has already been taken and saved. Alternatively, if you want to capture a part of snapshot on screen, press the “Command + Shift + 4” keys and then drag the crosshair pointer to select the area. Hold “Shift” and the space bar while you drag to resize the selection area of choice. If you wish to cancel, press the escape key before releasing the mouse button.
You can also capture a specific window within your screen by pressing “Command + Shift + 4”, press the space bar and move the camera pointer to highlight the window you want to capture.
2. Using Mac’s Mac Grab
Mac Grab is the default mac’s utility program for taking snapshot of the visible part of your monitor. To use the tool, double click the Grab icon to launch it. Now to capture the entire screen, press “Command + Z”. To capture a selected portion of the screen, press “Command + Shift + A”, a pointer will show up, press and drag to select your preferred area you want to capture.
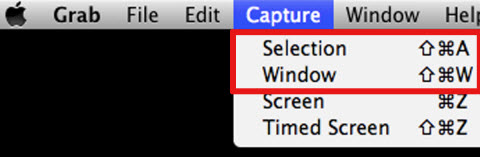
Grab tool also gives you the opportunity to take timed screen which lets you start a timer and activate a part of your screen and take a picture of it. To save the already taken snapshots, click edit and select “Save” option. You can be able to view the screenshots taken by selecting the “Edit” and then “choose inspector” option.
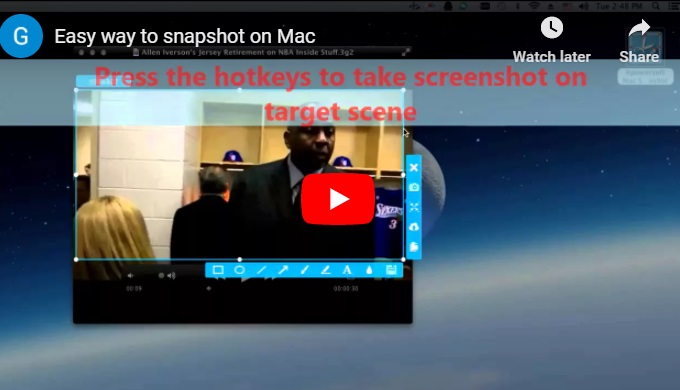
3. Using Apowersoft Mac Screenshot
Apowersoft Mac Screenshot is a very powerful snapshot tool developed for Mac OSX that allows you to take a picture of anything displayed on your Mac screen. Using this app, you can easily add annotations and share screenshots since it has a built in photo editor and up loader.

You can use the image retouching elements to add annotations like arrows and texts hence give your screenshot a clearer impression. It also comes with a screen magnifier which enhances readability. The upload feature allows you to upload the screenshots to the cloud storage whereby you can use the links to the screenshots to in your website or blogs, with all these smart features, this is undoubtedly your choice. Click the download button below and enjoy all its benefits.
