
A signature is a mark written by a person on a legal document to signify their consent and approval of the details written therein. For example, you need to get a personal document from a government agency, but you ask your brother to get it for you. In this case, you need an authorization letter with your signature attached giving permission to your brother to receive that document on your behalf. On that note, here are two solutions to insert signature in Word.
How to Insert Signature in Word?
SignEasy
Get the App: Google Play, App Store
The first solution is SignEasy. As its name implies, users can easily sign to any document using a mobile device. Moreover, it lets you sign using your fingers or using a stylus. Also, users can create a signature even when the device is disconnected from the internet. However, users can only sign for free on the first 3 documents, then you need to pay in order to receive unlimited usage. Follow the given steps below to learn how to draw signature in Word.
- On your device, download and launch the app.
- Create an account or sign up using your Facebook or Google account.
![Signeasy]()
- Next, hit the “+” icon to add a document you wish to sign. Once added, tap the “Pencil-like” button to draw a sign.
- When you are done, hit the check-mark icon to save the changes.

DocuSign
Website: https://www.docusign.com/
DocuSign lets you sign Word without having any trouble at all. It has a simple and clean interface so that people can use the tool conveniently. In addition to that, users can upload files from a local drive, Box, Dropbox, Google Drive, and OneDrive. Here is the step-by-step procedure on how to insert signature in Word with this online tool.
- Open up on your favorite computer’s browser on your computer and visit the main site of the tool.
- Next, hit “TRY ESIGNATURE” and then create your own account.
- After that, drag and drop the file to the program or hit the “START NOW” button to choose a file. Once uploaded, check the box “I’m the only signer”, and then hit “SIGN”.
- Next, click the “Signature” button and click the place where you wish to place the signature. Then click “Draw” and start signing in the box and hit “Adopt and Sign”.
![Docusign]()
- Lastly, hit the “FINISH” button.

How to Protect the Content of the Word Doc?
After showing methods on how to draw signature in Word, users may want to protect the content of the documents so that other readers may not be able to modify it. With that said, we will introduce two ways to protect the Word document.
Use Apowersoft PDF Converter
Get the App: Download
Apowersoft PDF Converter is a one-stop PDF solution which can convert several PDF files and vice versa. It can run on both computers and mobile devices. So, here are the steps on how to convert Word to PDF using this program.
Open the program and go to “To PDF”. Hit “Word to PDF” and then click the “Choose File”button or simply drag the file to the program. Finally, click the “Convert” button.

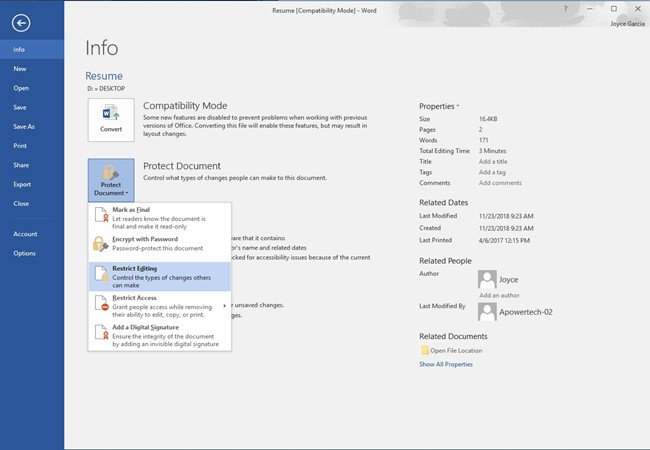
Use Microsoft Word
Microsoft Word also lets you add security to the file. See the guide below on how it works.
Open a Word file for which you want to add protection. Click “Options” and put a check mark to the “Encrypt the document with a password” option and hit OK. Lastly, enter and reenter the password you want for the file. After that, other people need to enter the password to view or edit your file.

Leave a Comment