A Full Guide to Use Apowersoft Watermark Remover
1. Introduction

Apowersoft Watermark Remover is a stunning piece of software that can magically process watermark on image and video. It allows you to select any area of the unwanted objects and remove them from your images/videos in batch while keeping the original quality. Its latest version comes updated with the feature of adding watermarks. You can now watermark your photos and videos with images and text both. Check the video below to have a quick understanding and use of the software better.

2. Retrieve the Latest Version
The latest version always comes with better capability, performance, and more functions than its previous version. The easiest way to get the newest version is to download it from our official website. Or you can download and install the new one by clicking the download button below. But be aware that you must remove the old version before you install the new one to prevent any issues. You also get our software from some of our business partners, such as CNET, etc.
3. Purchase and Activate the VIP Account
Drop down “Help” > “Purchase” at the top left of the interface. From there, you will be guided to the shopping page. You have three subscription plans to choose from: Monthly, Yearly and Lifetime. Each one sells at a different price.

Figure out the correct way to activate your VIP account:
For users who don’t yet have Apowersoft accounts: Click the “Account” icon and choose the “Sign up” option from the pop-up window. From there you need to set your email address and password. Then the system will send you a verification code. Follow the instructions in your email to complete the rest of the process to activate the trial version. Note that the trial version will have a lot of limitations.
For users who have Apowersoft accounts: Click the “Account” icon, then enter your email address and password to log in the software. Later, you can use the trial version. If you have purchased this software, it will automatically be activated, and you can use all of its functions without any limitations.

4. Configure Settings
It’s recommended to configure the default settings before you start using this software to remove watermarks. Click the “Settings” button to configure the specific settings.
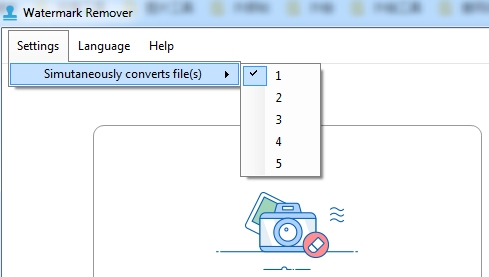
4.1. Settings
- Check the option of “Open folder after converting” to get the prompt when your files have been processed completely.
- Check the number of the files that you wish to convert simultaneously to control the CPU that the software will take to process the file.
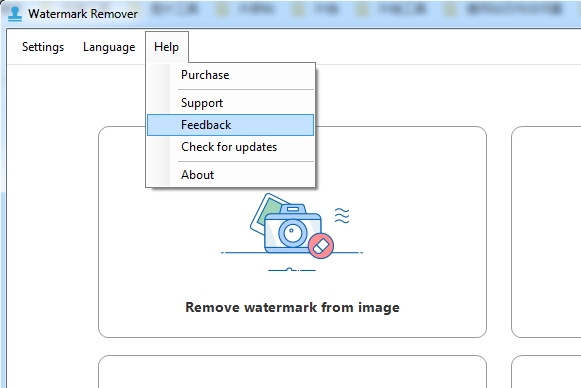
4.2. Help
If you come across a problem when using this software, you can click “Help” > “Support” to go to the Support Center for help. If you want to send software feedback or ask for technical support via the ticket system, then you can click “Help” > “Feedback”, fill in the required info, and submit your question.
5. Remove Watermarks
5.1 Remove watermarks from Images
Choose “Remove watermark from image” from the main interface and you’ll be brought to the corresponding window to remove photo watermarks.
Add Images – Drag and drop to add images to add the image from your computer into the software. You can add as many photos as you want at once. After the photos are imported, you can check them in the player window in real-time. Click the “Clear list” button to remove all imported pictures from the software if you want.

Choose the Method – There’re two ways to launch this function. One is “Regular Watermark Removal” which will process the pictures locally. Another is “AI Watermark Removal” which will handle your photos on the cloud server. The former method converts photos quickly and outputs the great result of the images that have solid color, while the latter method converts files on the web, but are good at processing watermarks that have complex backgrounds.

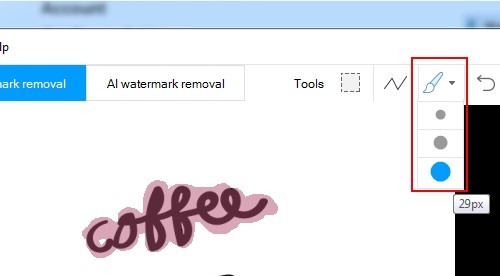
Select Watermark(s) – Highlight the imported images listed on the right of the interface, you can have three selection tools to mark the watermark. You can select as many watermarks or objects as you want in the photo. Click the red “X” mark to delete the selected area of the watermark.

- The marquee tool allows you to select the watermark in regular shape.
- The polygonal tool gives more freedom in select the watermark in irregular shape.
- The brush tool lets you select the watermark in any shape. And it has three sizes for the brush.
![brush tool]()
Tips: Repeat those steps for other images. Remember that only images that have been selected the watermark will be processed. The free trial version only allows for choosing one watermark at once.
5.2 Remove watermarks from videos
Choose “Remove watermark from video” from the main interface and you’ll be brought to the corresponding window to remove video watermarks.
Add videos – Under the “Video watermarks” tab, click the “Select video” button at the bottom to import videos, or you can also drag and drop them from your computer to the software. Also, you can import as many videos as you want at one time. After the videos are imported, you can check them in the player in real-time. Click the “Clear list” option under the player window to remove all imported videos if you wish.

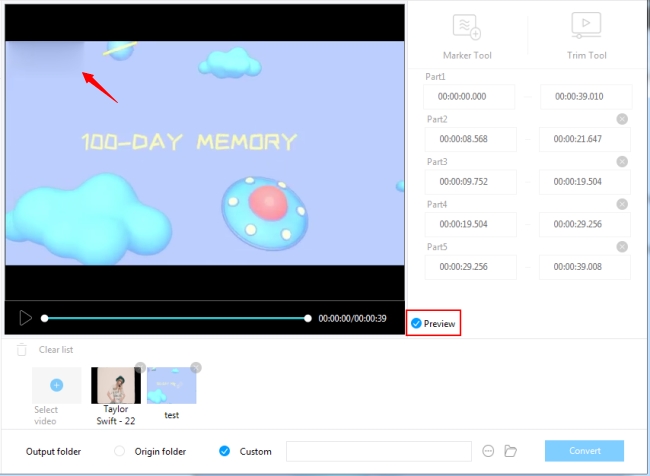
Select watermark(s) – Highlight the video thumbnail at the bottom, click the “Selection Tool”, then a box will appear in the video, you can change the size of it, move it to anywhere that you want, and set the time for it if the watermark appears in the certain part of the video. By default, the time for the watermark box is set from the beginning to the end of the video. Click the “Add parts” button, and you can set the time for up to 5 watermarks at once. Click the red “X” mark to delete the box if you want.
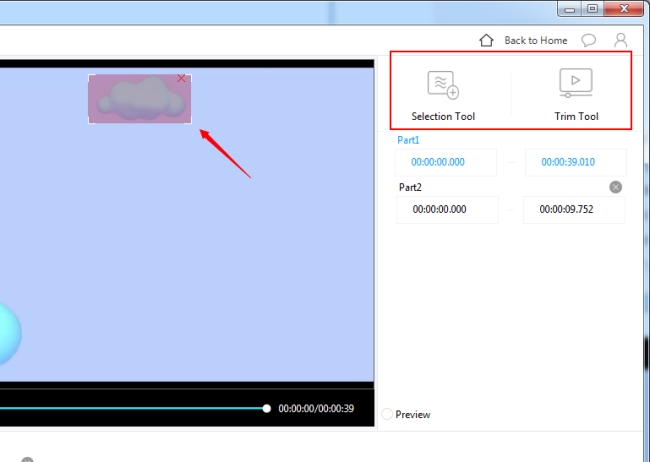
Preview – Check the “Preview” option on the lower right part of the player window, and you can check the result effect in real-time. Note that you have to cancel the preview or stop the playback if you want to go with other operations.
Tips: Repeat those steps for other videos. Only videos that have been selected the watermark will be processed. The free trial version only allows users to select one watermark at once.
6. Add Watermarks
6.1. Add watermarks to images
Choose “Add watermark to image” from the main interface and you’ll be brought to the corresponding window to add watermarks to images.
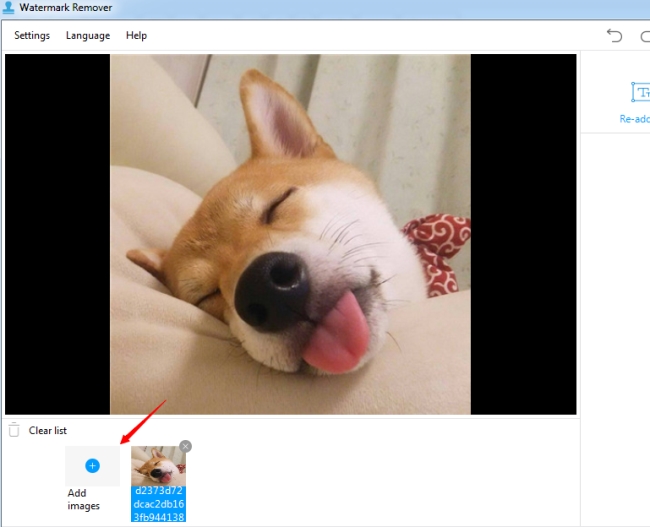
Add Images – Drag and drop to add images or you can also click the “Add images” button at the lower left corner of the interface to import images from your computer to the software. After that, you can check them in the player real-time. Click the “Clear list” button, and you can remove all images that you added.
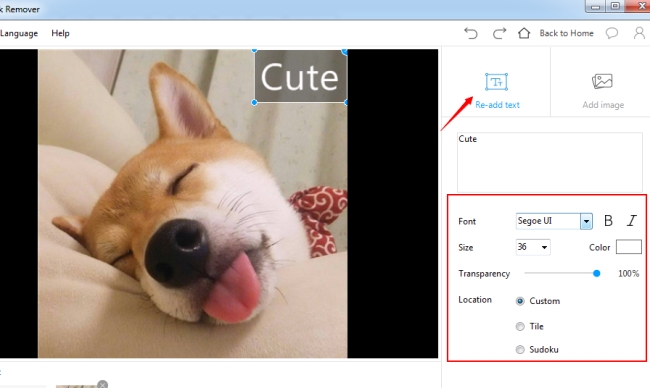
Add text watermark – click the “Add text” button on the upper right corner of the interface, and a box will appear over the image, in which you can write down anything you want. After that, you can make some customization of the font, size, color, effect, location, and transparency, etc.
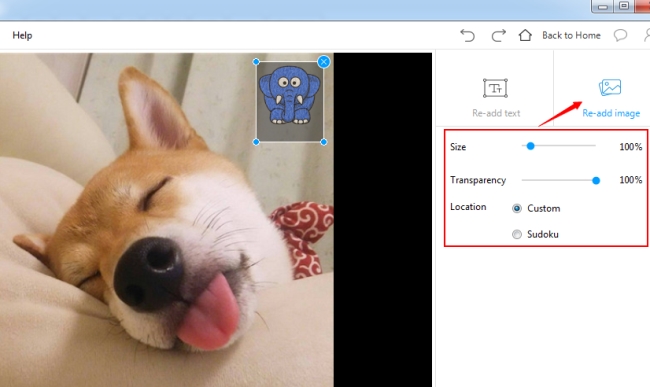
Add image watermark – click the “Add Image” button to import images from your computer to use as a watermark. You can also customize the size, transparency, and location, etc.
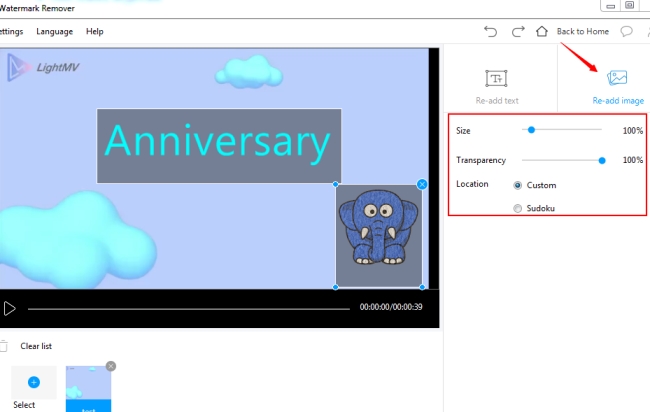
6.2. Add watermarks to videos
Choose “Add watermark to video” from the main interface and you’ll be brought to the corresponding window to add watermarks to videos.
Add videos – Drag and drop to add videos, or you can also click the “Select video” button at the lower left corner of the interface to import videos from your computer into the software. After that, you can check the video in the player in real-time. Click the “Clear list” button, and you can remove all imported videos.

Add text watermark – Click the “Add text” button on the upper right corner of the interface, and a box will appear on the video, in which you can write down the text. After that, you can customize the text by adjusting the font, size, color, location, and transparency, etc.

Add image watermark – Click the “Add Image” button to import images from your computer to use as the watermark. You can customize the size, transparency, and location, etc.
Tips: You can add as many image/text watermarks as you want for your photo and video, but the free trial version only allows to add one type of watermark.
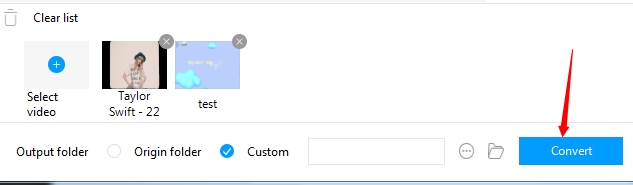
7. Choose the output folder
Check the “Origin folder” to save the processed files into the default folder. Or you can also check “Custom” and click the “three dots” icon to set your preferred folder for the output files.

8. Start conversion
After the above settings, you can click the “Convert” button to process the files. Check the progress bar, and a window will pop up to remind you that the conversion is finished when they are converted successfully. Then the output folder will be opened automatically.
Leave a Comment