
Apowersoft GIF is a piece of stunning GIF maker software that can create GIFs from videos, pictures and even raw GIFs easily and quickly. It has a built-in screen recorder that allows you to record your screen and save as GIF in high quality. Check out the below content to understand and use the software better.
A Full Guide to Use Apowersoft GIF
Options
Apowersoft GIF provides users with personalized options. You can customize the settings of the built-in screen recorder, interface color, tasks that will be automatically processed, shortcuts, language and the directory for the temporary files.

Create GIF
Currently, Apowersoft GIF offers three recording modes – Recorder, Webcam, and Board to create your video and save as GIF.

Recorder
Click the “Recorder” button and a window will be brought out, which you can adjust the size of the screen that you’ll record on the computer by manually inputting the pixel of the width and height. Or you can also move your mouse over the bottom right corner until an arrow appears, and then drag it to set the size. You can also manually set the frame rate. Click “Record” (F7) to start recording the video, and click “Stop” (F8) to finish your recording.
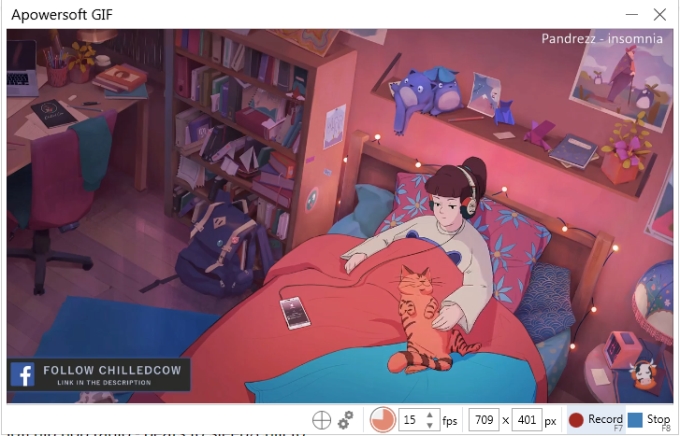
Tips: After you start recording, you are not allowed to adjust the size of the window that you are recording, but you can move the window to anywhere that you want.
Webcam
Click the “Webcam” button, and you can record video from your webcam. Apowersoft GIF will detect the webcam first, and the video will be displayed in the window. After that, you can set the frame rate, click “Record” to start recording and “Stop” to finish recording.

Board
Click the “Board” button, the whiteboard will come out and the software will automatically record the process of your drawing. At the top toolbar section, choose the color for the pen, click the pen icon to start drawing. If you want to remove some part of your drawing, you can click the eraser icon to delete the unwanted parts.

Tips: All your drawing process will be recorded. If you want to disable this function, you can click the “Auto Record” or press and hold the Ctrl button on the keyboard.
File
Click the “Editor” button and you will be guided into the editor panel which includes 7 main function tabs here. And each tab has many other useful functions.
Under the first “File” tab, you can create a new animated GIF, insert GIF into the current file, and save the GIF file you created.
New
You can create a GIF file in four ways.
- Recording: you can create your new GIF from the file recorded with this built-in recorder.
- Webcam Recording: you can also create a new GIF animation from the webcam.
- Board Recording: make your new GIF file from your whiteboard recordings.
- Blank Project: create a new animation that you can set the size and background color.
Note that the last GIF file edited in this panel will be automatically discarded after you create a new file.

Insert
Similarly, there are four functions: “Recording”, “Webcam Recording”, “Board Recording” and “Media” under this tab.
- Recording: click this button and you can start to record a screen on the computer and insert it into your current file.
- Webcam Recording: this function allows you to record video from the webcam and then insert into your file.
- Board Recording: it lets you record your whiteboard drawing and insert it into your current project file.
- Media: you can also import media file from your computer and add to your current GIF file.
After you choose the frames that will be added, you will find the new frame and the original frame displaying in the window. From there, you can choose to place the new frame before or after the current list of frames.

File
Under the “File” tab, there are “Save as”, “Load”, “Recent Projects” and “Discard Project” buttons.
- Save as: By clicking this button, you can go to save your file as an animated GIF, PNG, video, images, PSD and other formats.
- Load: Click this button and you can open a new file in the editor while discarding the original file.
- Recent Project: This function allows you to open the recently edited files.
- Discard Project: It allows you to discard the file that you want to remove from the editor.

Home
Under the Home tab, there are four main functions: Action Stack, Clipboard, Zoom, and Select.
Action Stack
You can choose to undo, redo and reset your settings if you are not satisfied with the effect.

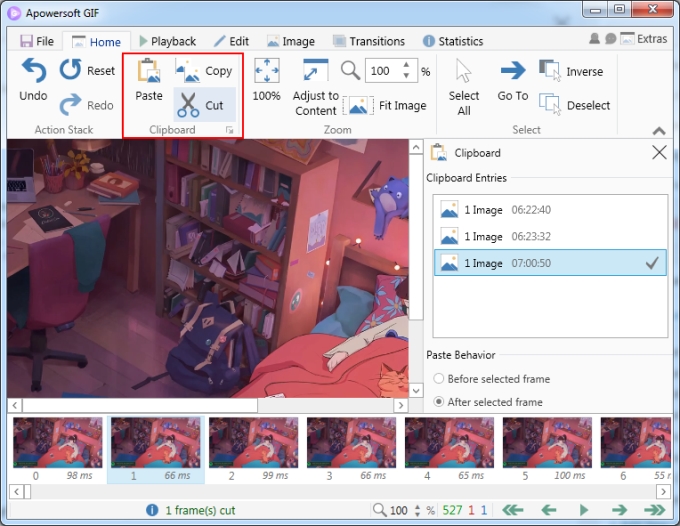
Clipboard
You can copy, cut and paste one or more frames in your file. And the selected frame will show in the right window in which you can choose open the folder where it’s saved in or remove it from your current file.
Zoom
You can choose to zoom the frames to the size that you want. Or adjust the size of the frame compatible with the software window. Take note of that it will not affect the width and height of the final file.

Select
You can select all frames, go to the select frame, inverse to the unselected frames, or deselect frames.

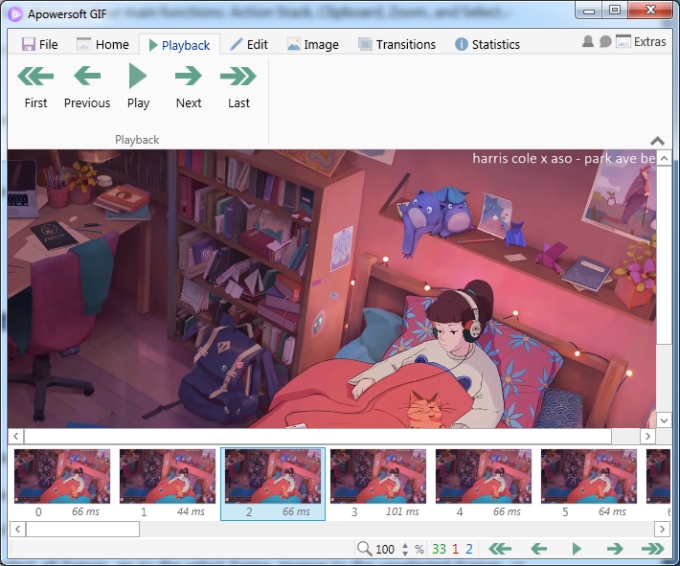
Playback
Under this tab, you can play the frame based on your needs in real-time. You can play from the first frame to the last frame, or play from the one before or after the selected one, etc.
Edit
In this interface, there are also three main functions that you can use to edit the frames.
Frames
- Delete: remove the selected frames from the file.
- Remove Duplicates: delete the duplicate frames from your file.
- Reduce Frame Count: Reduce the frame rate by deleting X frame after every Y frame. For example, if you set the “Factor” to 1 and the “Remove Count” to 3, then the software will remove 3 frames after every 1 frame.
- Delete All Previous: Remove all previous frames before the selected frame.
- Delete All Next: Remove all next frames after the selected frame.

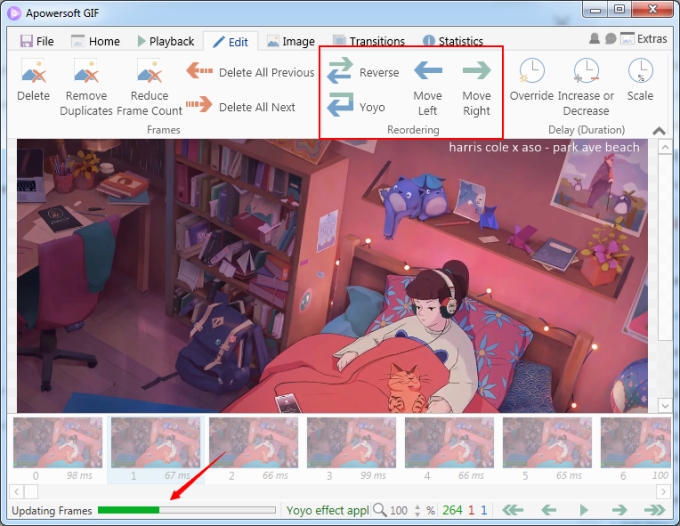
Reordering
- Reverse: Reverse the frames.
- Yoyo: Reverse and loop the frames.
- Move Left: Move the selected frame to the left (last frame).
- Move Right: Move the selected frame to the right (next frame).
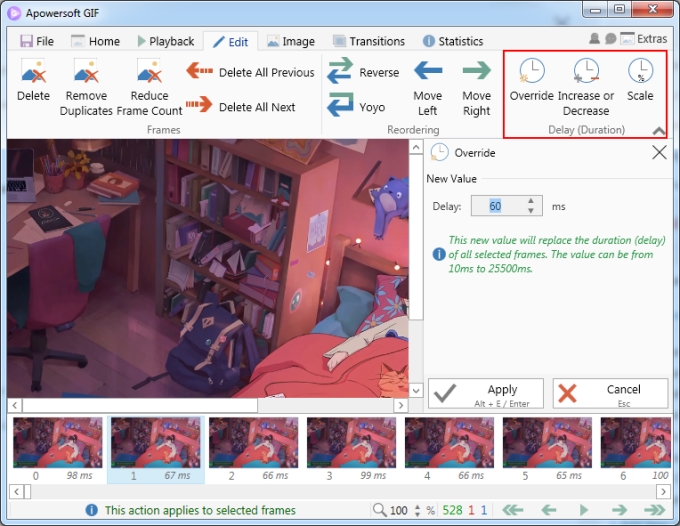
Delay(Duration)
- Override: Set the time duration for the selected frame(s).
- Increase or Decrease: Choose to increase or decrease the duration of the selected frame(s).
- Scale: Set the percentage to reduce the duration of the selected frame. For example, if the frame is 100ms long, and the frame will be 10ms long after we set the percentage to 10%.
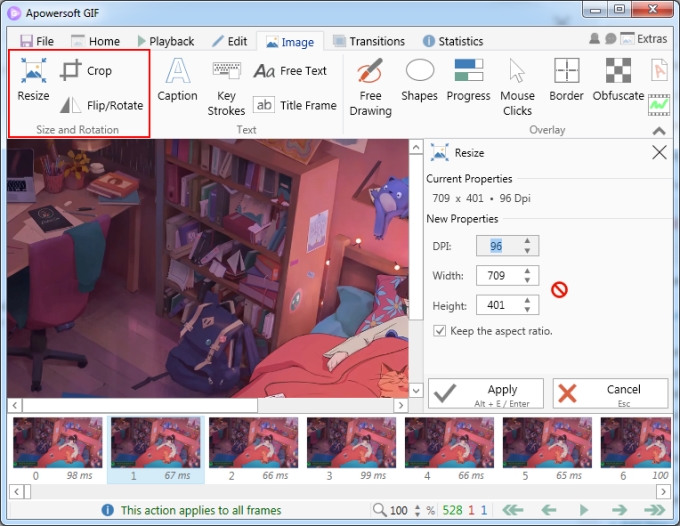
Image
Under the “Image” tab, you can add more special effects to your GIF file.
Size and Rotation
You can resize, crop, flip and rotate the frames.
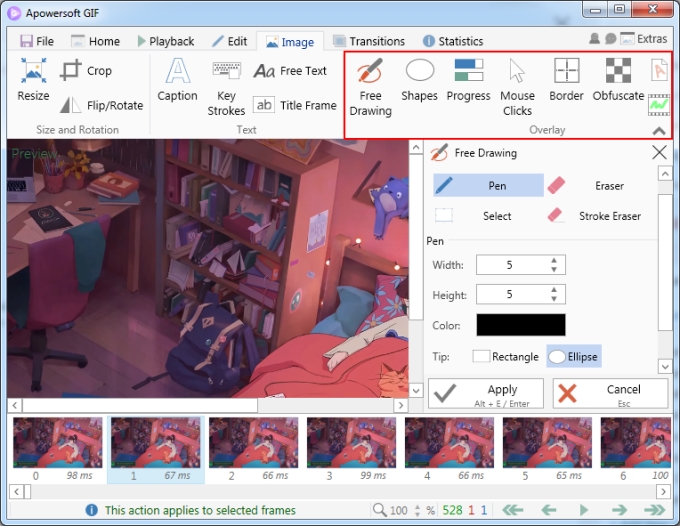
Text
Click the “Caption” button and you can add text to the selected frame, set the color, size, style and effect of the fonts.

Overlay
With this function, you can freely draw, add shapes, add the effect of mouse clicks, add borders, watermark, blur and many other special effects into the selected frame.
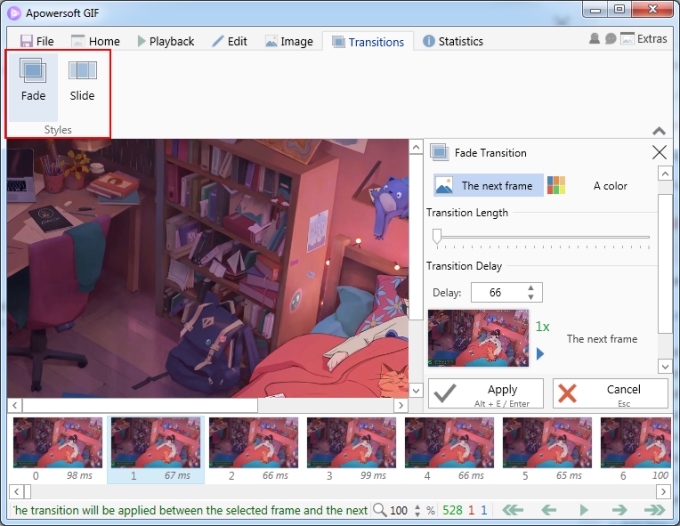
Transition
It has two transition effects available: fade and slide. You can set the effect duration and delay for the frames that you choose as you want.
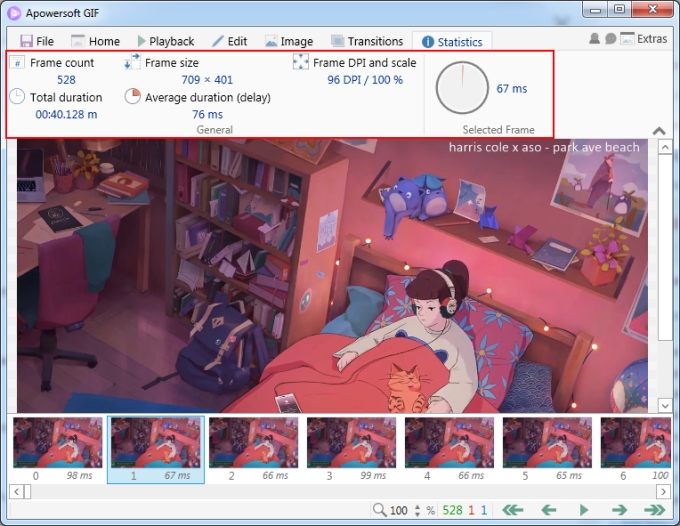
Statistics
Under this tab, you can check the detailed info about the frames, for instance, the number of the frames, the total duration, the frame size, the average duration, the duration of the selected frame, frame DPI and scale, etc.
Help
Apowersoft GIF is intuitive to use that anyone can get used to it quickly and easily. If you have any questions or concerns while using it, you can drop down the “Extras” options at the top right corner, choose “Feedback” and enter the required info in the pop-up window. We’ll get back to you as soon as possible after we receive your feedback.

Leave a Comment