How to Use ApowerREC
1. Introduction
ApowerREC is a multi-purpose screen recording software that enables us to record desktop and webcam activities with system sound and microphone sound. And it provides many recording modes options, such as task scheduler, auto stop, spotlight, exclude-window and more. With its annotation tools, we can easily use this recorder to draw lines, circles, arrows, or add texts to the screen during the recording. No matter we want to record online meetings, courses, video chatting or other online videos, ApowerREC can help us to record all of it.
2. Installation
1. Click the button below to download ApowerREC.
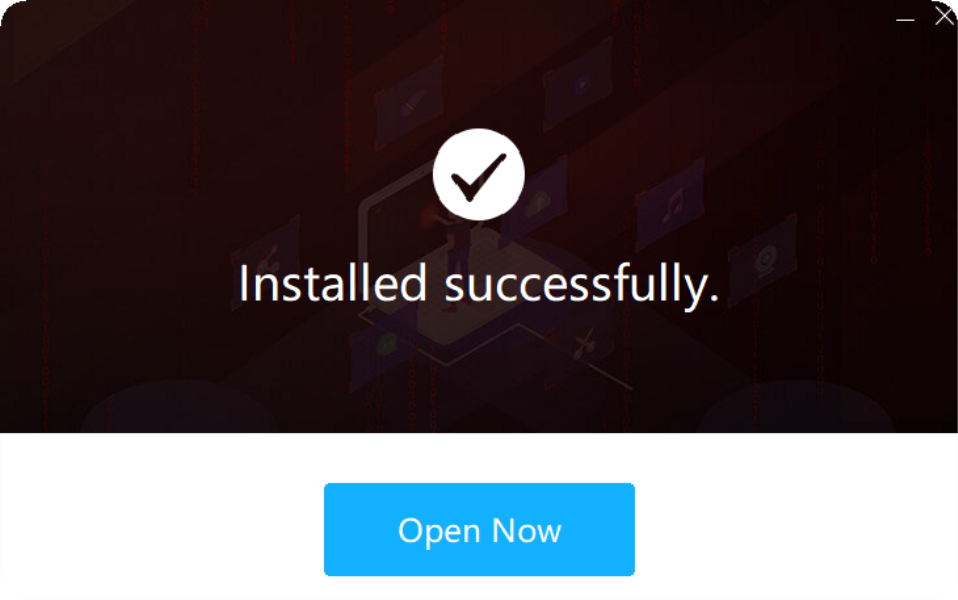
2. Click “Install Now”.

3. Click “Open Now” and the program will be launched.
3. Registration
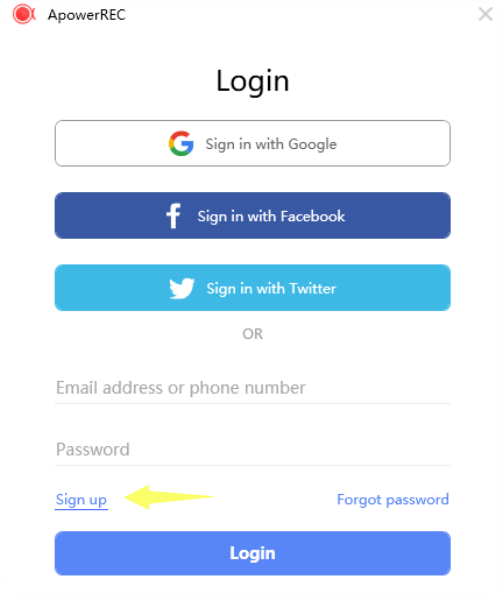
1. Click “Log in” at the top right corner of the main board.

2. We can use the third-party login directly or click “Sign up” to register an account.
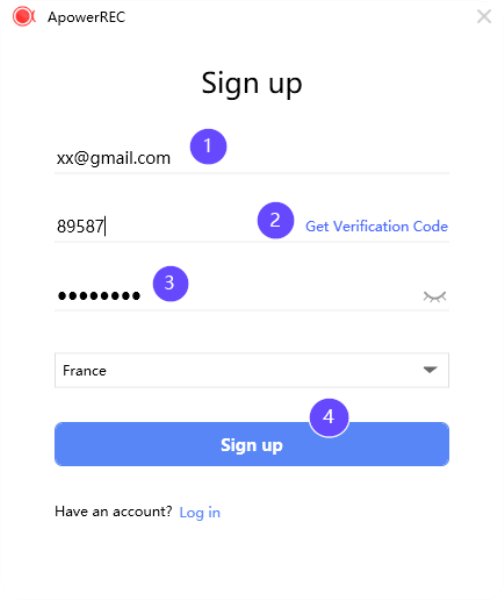
3. Once clicked “Sign up”, enter the email address → click “Get verification code” → the code will be sent to the email address we just filled in the first blank → paste the code at the second blank → fill in the password → click “Sign up”.
4. Settings
4.1. Output folder
Before the recording, we can enter the “Settings” and adjust multiple recording parameters or settings.
All the recorded videos will be saved to the output folder we selected under the settings. We can change for another output folder here if the current one doesn’t have enough space storage left for saving the videos.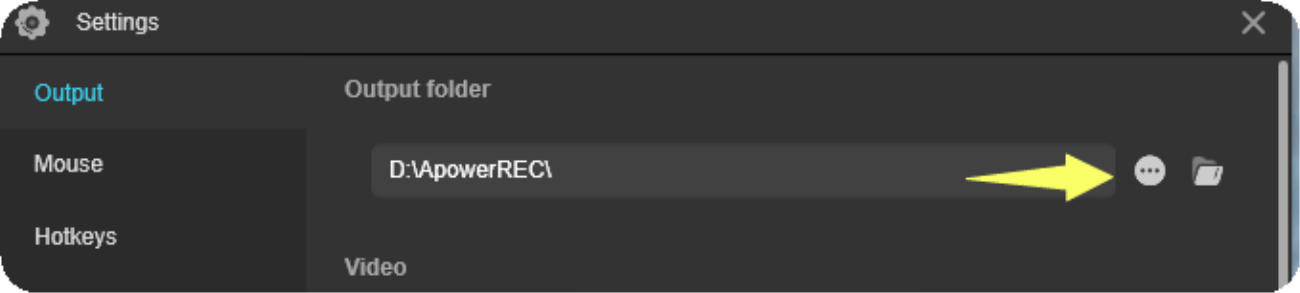
4.2. Recording parameters
Before the recording, we can adjust the resolution, bitrate, frame rate and more.
4.3. Hotkeys
Here we can re-combine the hotkeys for certain recording instructions. Simply select the hotkey and use the right panel to re-combine it is alright.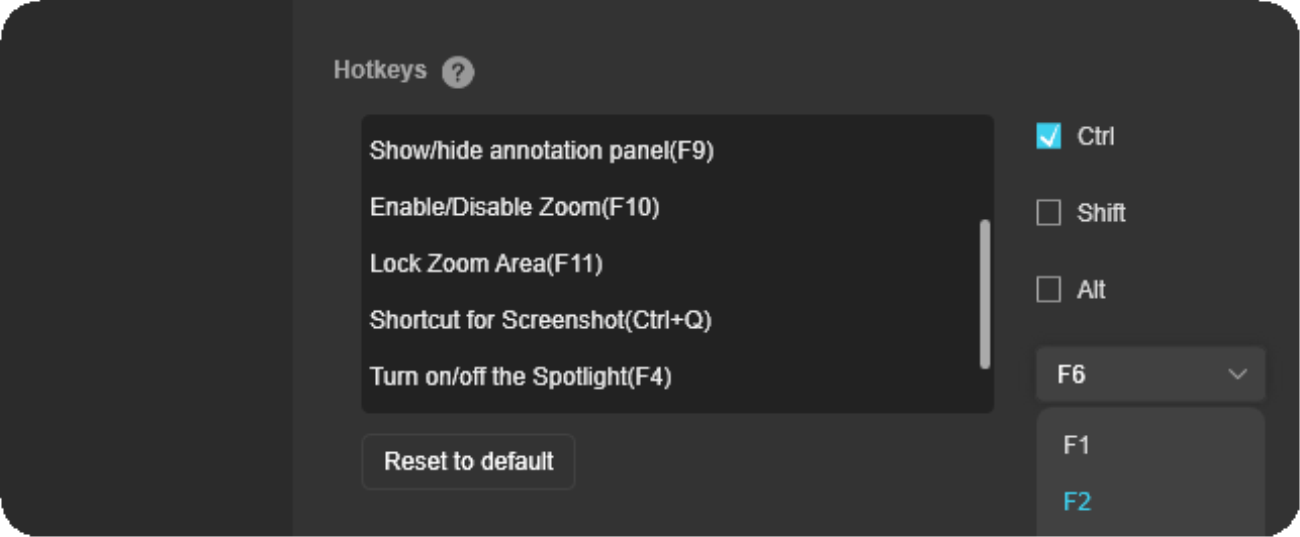
4.4. Mouse cursor
To include mouse cursor in the video, simply click “Show mouse cursor”. Or, we can check “Show mouse area” to show real-time mouse clicks in different sizes and colors.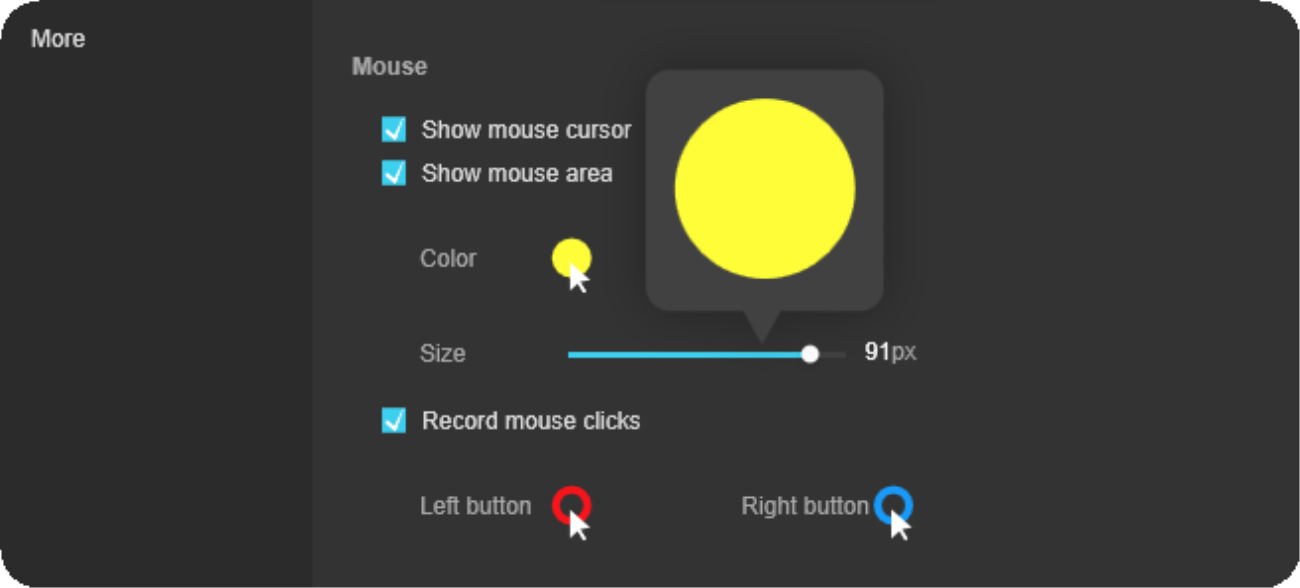
4.5. Preferences
Besides, more options are available for different recording purpose. We can hide or show taskbar or desktop icon, exclude main board and more.
Don’t forget to click “OK” at the bottom right corner once all the settings are adjusted.
5. Recording
5.1. Start recording
1. Click “Full” and the program will record the entire desktop screen by default.

2. We can also click the downward arrow next to “Custom” and expand the menu where we can use the available fixed regions, or we can select random region.

3. Expand the “System sound” menu, we can record system sound, microphone sound, both or no audio. Simply enter “Settings” under the “System sound” to check whether we have selected the same default system sound source under PC sound settings, as well as the microphone device that we plugged in, so as to avoid no-audio situation after the recording.

4. Once finished all the settings, click “REC” to start the recording.
5.2. Annotation
Click the third pencil-liked icon on the floating toolbar to use annotation tools, we can add arrows, lines, serials numbers, texts and add whiteboard, etc.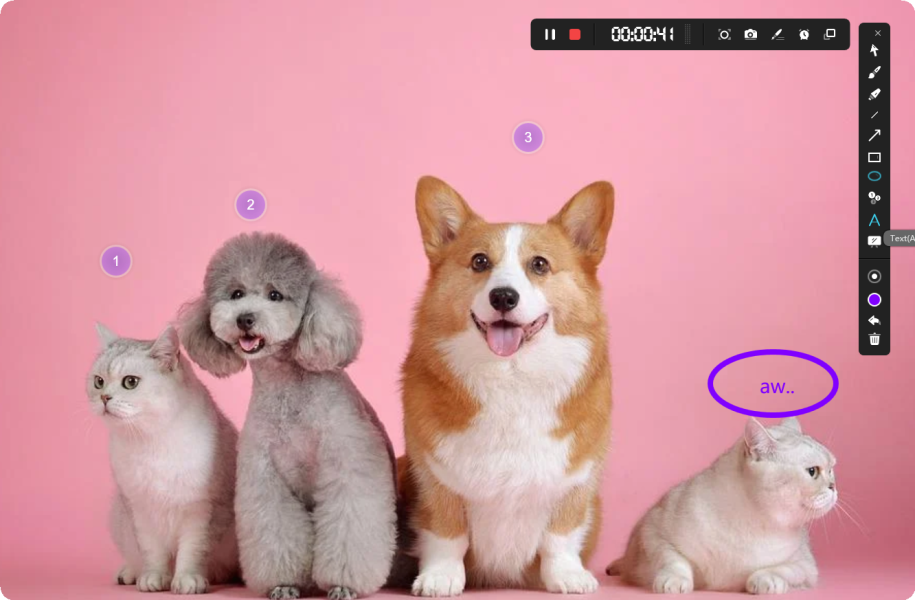
5.3. Spotlight (Windows Only)
Click the icon shown in the image below to use Spotlight mode. Under this mode, we can emphasize certain part of the screen.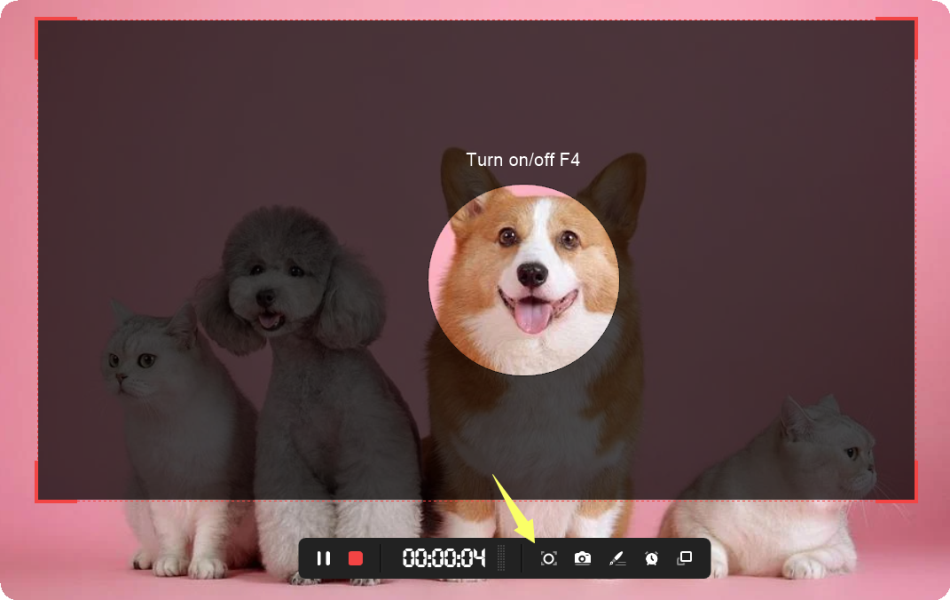
5.4. Stop/End recording
On the floating toolbar, we can also stop and end the recording. To stop the recording, it means we can stop the recording in the middle and then come back to continue the recording. While ending the recording, means the recording is finished.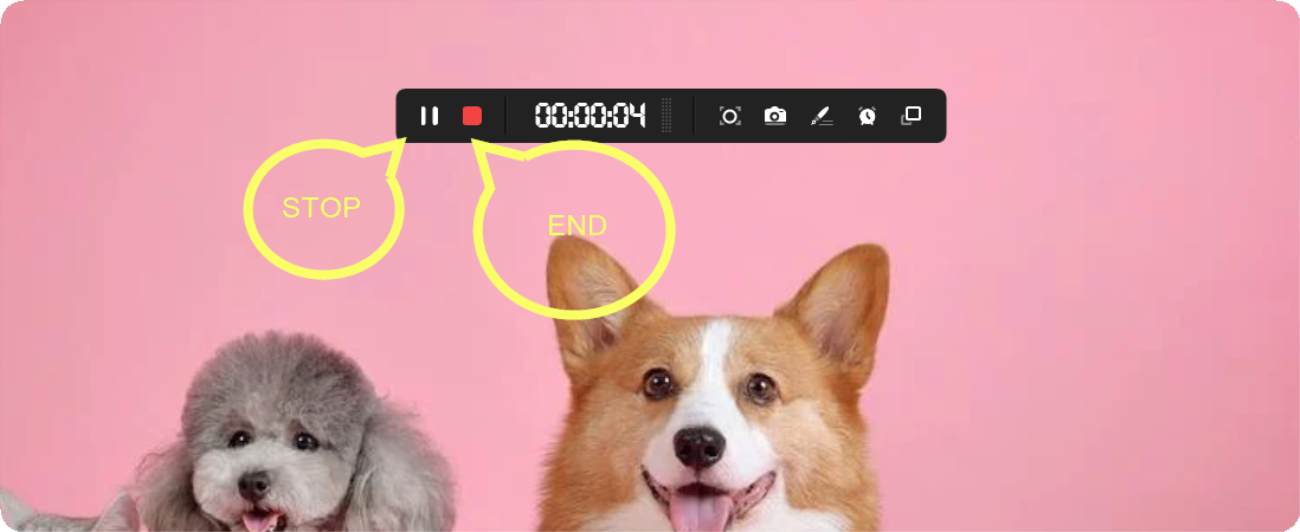
6. Video Editing
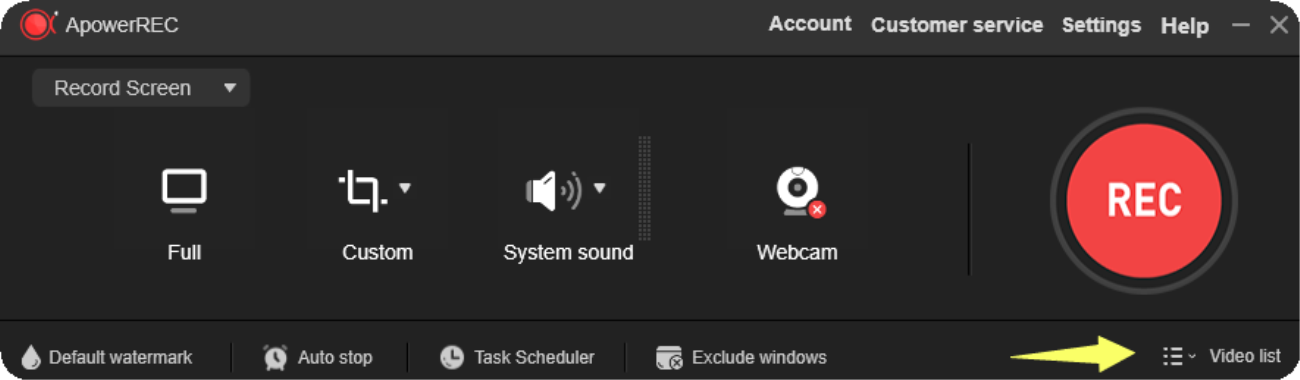
6.1. Video list
1. Enter “Video list” at the bottom right corner of the main board to check all the recorded video and edit the video.
2. Here we can check all files, video files, audio files and screenshots in order.
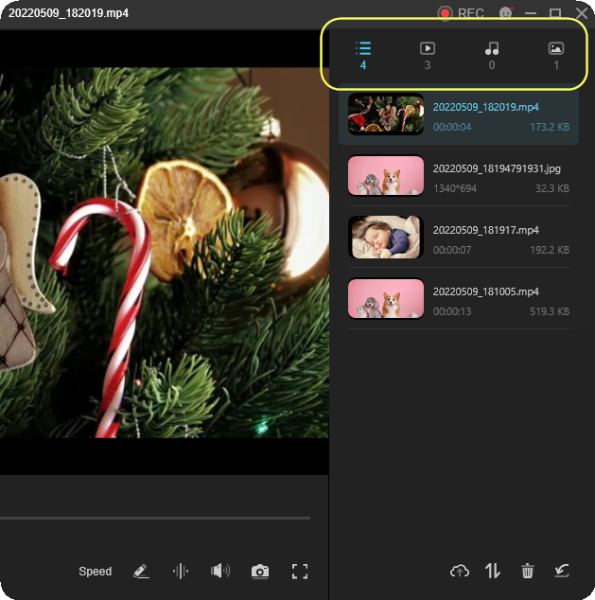
3. Right click the file, we can upload the video to cloud storage, or rename, delete and compress the video, etc.

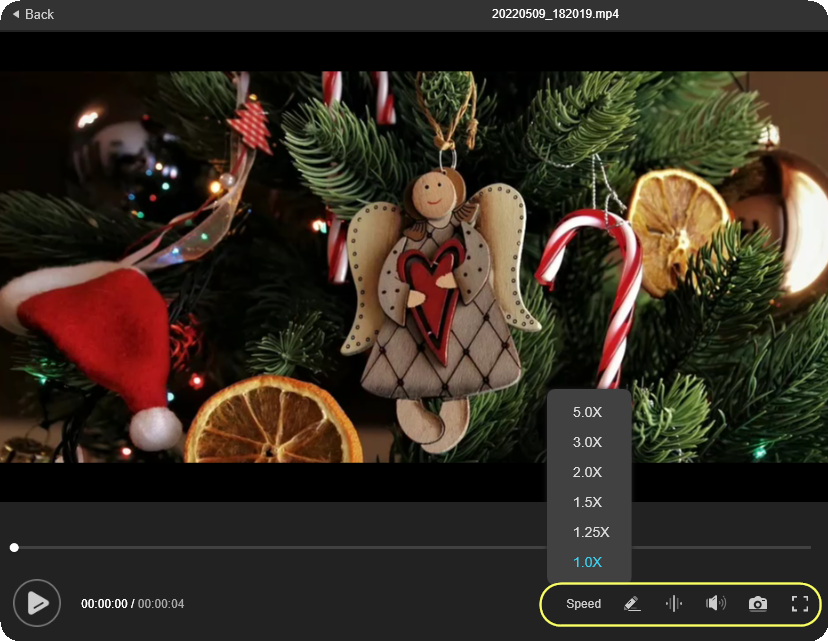
4. At the bottom right corner of the preview window, we can play video in different speeds, edit video, extract audio file alone, adjust volume, take screenshot or view video in full screen.
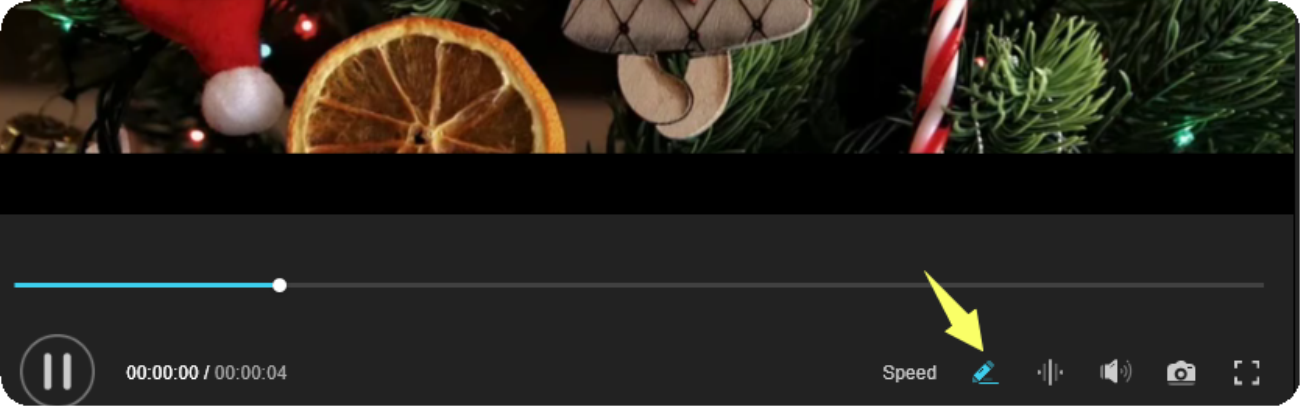
6.2. Video editor
1. Enter the video editor by clicking the edit icon as the image shown below.
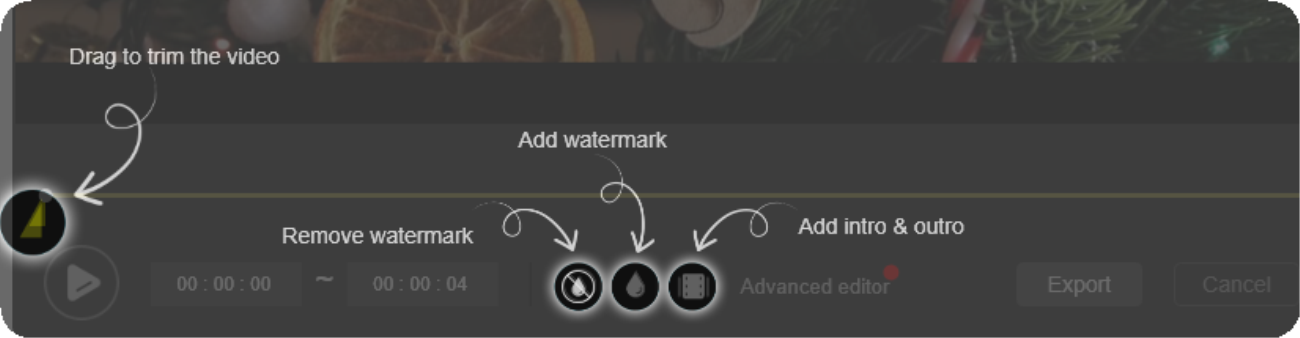
2. Here we can trim the video length, add/remove watermark, add intro and outro.
7. Recording Mode
At the bottom menu of program main board. We can find other recording modes that can be used according to personal preferences.
7.1. Add watermark
We can decide whether to add image watermark, text watermark or no watermark before the recording. In order to make sure the watermark effect is added as what we exactly want, we can click “Full-Screen” button at the bottom right corner to see how’s the watermark actually looks like.
7.2. Auto stop
Here we are able to pre-set the recording length, starting time, or the file size of the recording, so that the recording will be stopped and saved automatically when it reaches the limitation we set.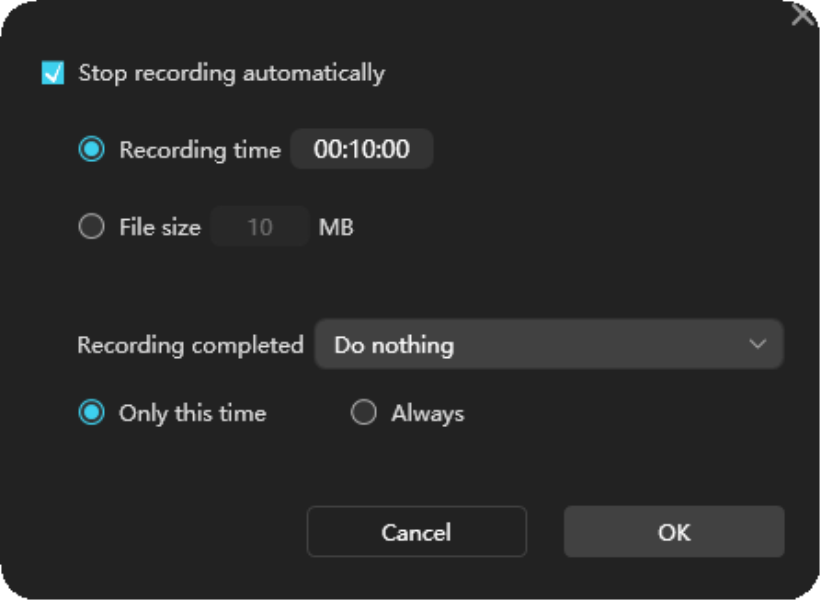
7.3. Task scheduler
This is more like a professional “auto-stop” recording mode where we can find much more detail provided to us. Such as more recording settings, whether we want to repeat this recording plan from Monday to Sunday, etc. You can disable or enable the recording task you created anytime you want. It’s more flexible and practical.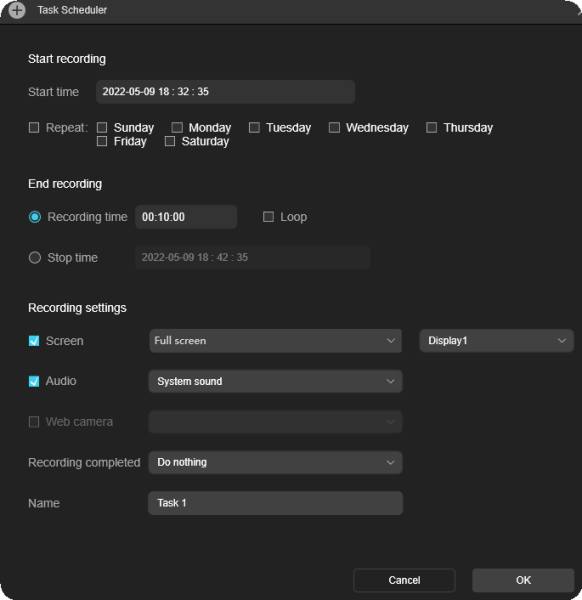
7.4. Record window
If you only want to record certain program, and not included any other programs you may use during the recording, this recording mode will be your best choice. Simply find this mode under the top left menu as the image shown below and select the program you want to record is alright. Making sure you have already launched the program you want to record before selecting it in ApowerREC.
8. Video Tutorial
Simply click the links below to check out how to use a certain feature of ApowerREC.
1. How to change saving directory, set video format, or adjust recording preferences
2. How to record full or regional recording
3. How to use video list and video editor
4. How to record a specific application window
6. How to set the start and end time of the recording
7. How to add watermark to the recording
8. How to exclude a certain application from the recording
9. How to control video file size within an appropriate range, adjust resolution or recording fluency
9. Support & Feedback
To reach out to us for any possible troubleshooting, you can check our regular solutions, or visit our support center and click the “Chat” icon at the bottom right corner to communicate with our customer service directly. More, you can also submit ticket to send feedback to us.