If your recording is interrupted by a computer break-down, or the recording is stopped all of a sudden, please follow the guides below to recover the damaged recordings or the temp video files.
First of all, please enter the settings.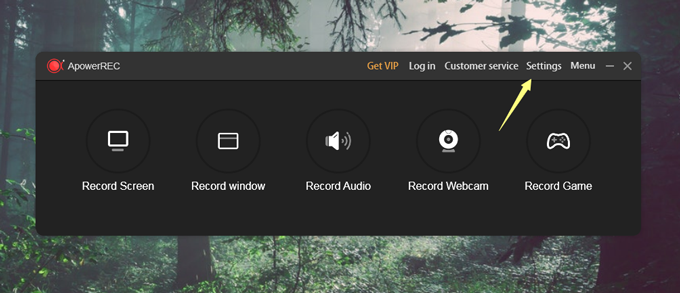
Then, find the default saving directory and check out whether your damaged recording is in a broken MP4 format, a broken FLV format, or in two temp files as in flv. and aac. format.
Simply apply the correspondent solutions according to the video format.
Broken TS Format
- Download the fixing tool.
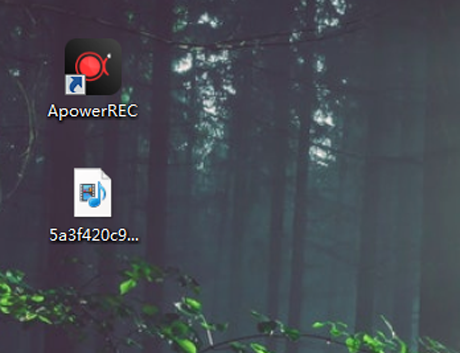
- Move the TS format video file to the desktop.
![move ts video]()
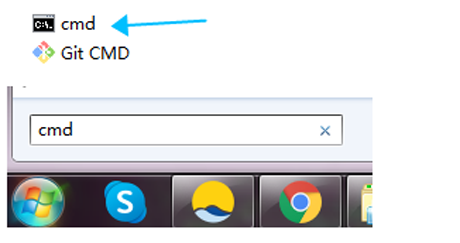
- Open the windows menu and search “cmd”, then open it.
![search cmd]()
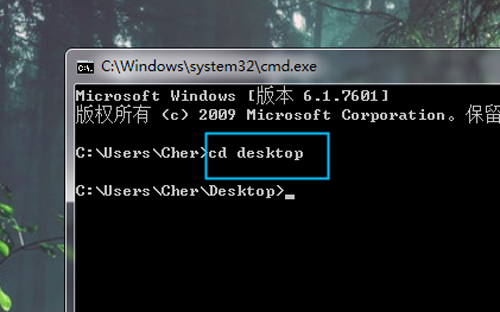
- Then enter “cd desktop” at the place shown below, and click the Enter button of your keyboard.
![enter cd desktop]()
- Copy and paste “ffmpeg -i xxxx.ts -c copy xxxx.mp4” to the place shown below. Next, replace the “xxxx” parts with your video file name and click Enter button of your keyboard, then a recovered video file will show up on the desktop.
![last step]()

Broken FLV Format
- Download this fixing tool and decompress the file.
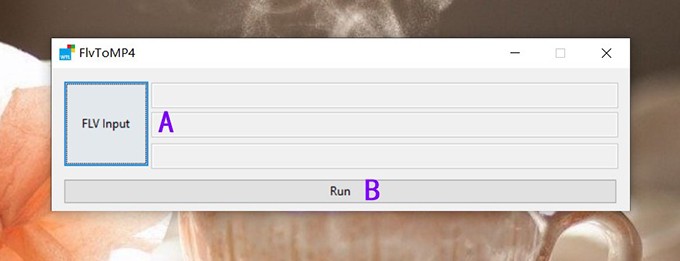
- Click “FLVToMP4”.
- Click “FLV Input” to import the video you want to repair, then click “Run”.
![flv to mp4]()
Two Temp Files in flv. and aac.
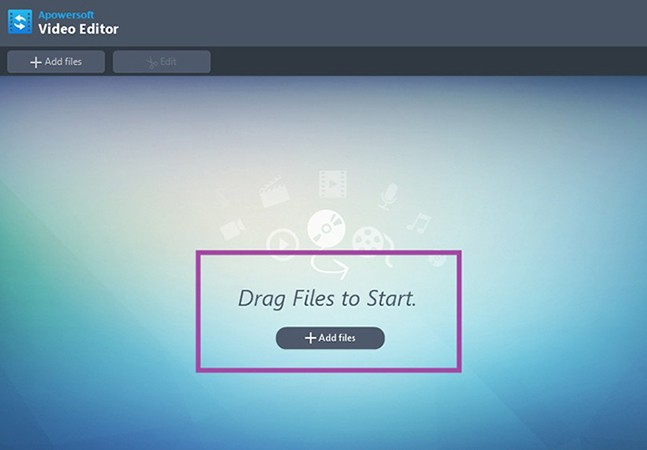
- Download and install video converter.
- Launch the program. Click “+ Add files” and upload the flv format video.
![add flv video]()
- Then, click the upward arrow to drag down the menu and choose “Add audio…” to upload the acc audio file. And click “OK”.
![add aac video]()
- Click “Convert” at the bottom right corner of program’s main interface.
![click convert]()


Summary
Published On
Leave a Comment