Apowersoft Video Converter Studio is easy yet powerful video/audio processing software running on Windows OS. It can not only convert but also edit video/audio files easily. Additionally, it can play almost all kinds of video/audio files by using its built-in HD media player. At present, the newest version has added more practical functions. The illustration below may help you know and use the software better in details:
A Full Guide to use Video Converter Studio 4.0
Settings Configuration
Preferences
You can change the default settings to satisfy your own needs. For example, you are free to choose the folder to locate your converted files, screenshots, downloaded files and recorded files. Check the Preferences option to know more details.

Language
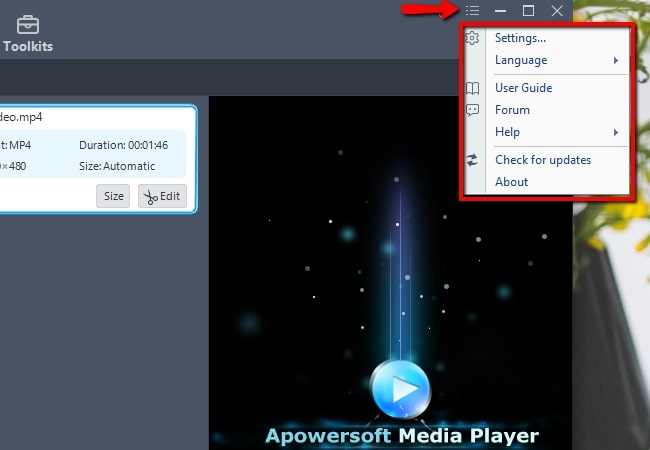
You can choose from 20 language interfaces. You can change the language by clicking “Settings” > “Language” in the main menu and choosing the Language you want to use.
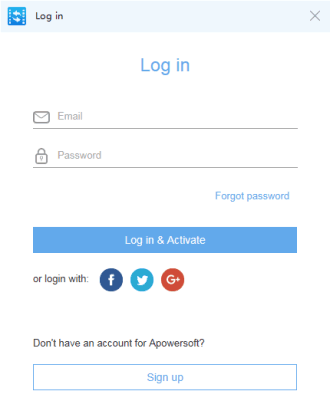
Activation
For further info to activate Video Converter Studio, please click here to know the details.
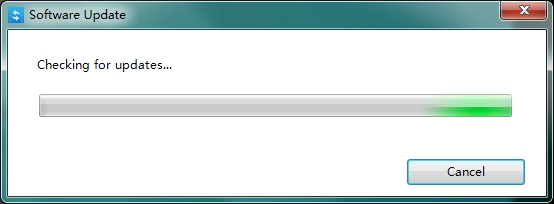
Check for Updates
If a new version of Video Converter Studio is available, you can check update manually by clicking “Settings” > “Check for Updates” in the main menu, the program will pop up a notice window for asking you to update.
Video/Audio Conversion
Add files into the program
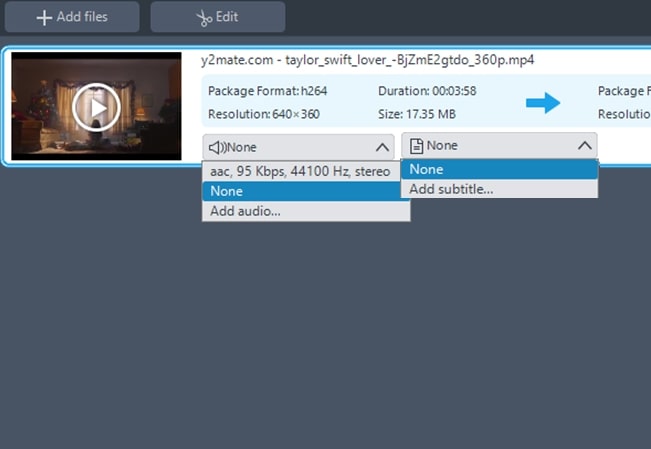
Add files – Click “Add files” button on the toolbar and then choose video/audio files you want in the dialog opening subsequently, or you can drag your files to the interface directly. You can also add files by clicking the right button and choosing add files, and then choosing the files you want in the dialog that opens. The loaded files will be displayed on the file list.

Remove files – You can click “Removed selected” to remove selected files or clear the list by clicking “Clear task list” if you have chosen mistakenly. After the videos and audio are added into the program, all the files will be on the list. If you want to combine multiple files into a whole one, you can check Merge into one file.
Note:
- Select a file and right click it “Source Media Information” to check detailed information of the loaded files.
- Select a file and right click it > “Open File Location” to check concrete location of the added files.
- Click the “Audio Track toolbar” to select an audio track. Or you can add additional audio track from your hard disk.
- Click the “Subtitle toolbar” to choose an external subtitle if there are more selections.
Select the output format
Click to open “Profile” drop-down list, then choose the profile you want from the classified profile list. It can convert files to video formats like MP4, MKV, AVI and WMV, audio formats such as MP3, WMA, M4A and so on. And it also adds choices suitable for your devices like iPhone series, Samsung series, HTC, blackberry, Sony and many other devices.

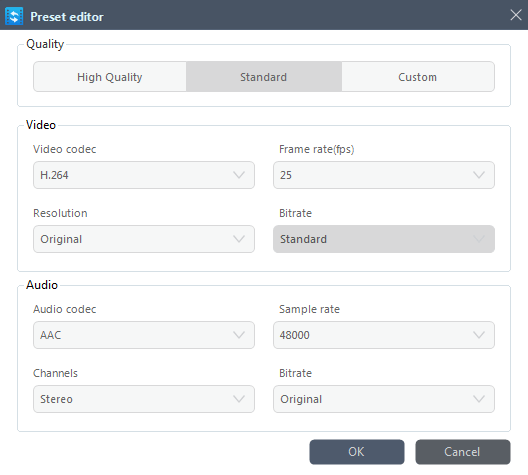
If you’re not satisfied with the original profile parameter settings, you can click “Settings” button and adjust them in the “Preset Editor” window.

Choose output folder
Click drop-down button in the “Output” bar, then choose the destination folder for saving output files in the dialog that opens, and click OK button to return to the main window.

Start Conversion
After the above settings, check the files needed to convert in the file list, and click Convert to start video conversion. You can check the progress from the progress bar at the bottom of the main window.

Note:
- Click “Stop” button to stop the conversion according to your own need anytime during conversion. Converting a long video may cost a lot of time.
- Check “Shut down after the conversion”, the computer will shut down automatically after completing conversion.
Video/Audio Editing
PS: Remember when you hit OK in “Edit” window and were taken back to the convert section, you need to choose a file format and press the lower right “Convert” button to save changes.
Select a Video
Select a video, click “Edit” button and enter the Video Edit window to design your video/audio files.
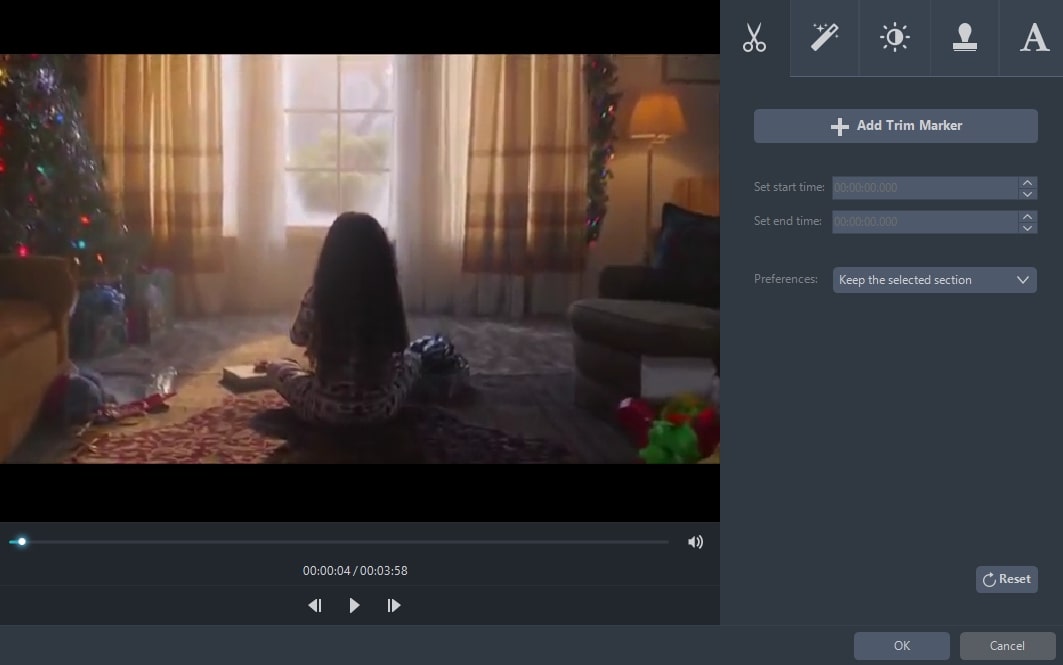
Trim Video File
You can trim the video by clicking “Add Trim Marker” button and set the start and end time by dragging the slider or clicking the up or down button to adjust time by seconds. Open “Preferences” to choose “Keep the selected section” or “Delete the selected section”. And you can click “Play” button to preview the changes or “Reset” button to cancel it.

Crop Video Screen Size
Move your mouse pointer onto one of the four blue solid lines on the cropping frame and drag the crop frame to crop the video. Setting the size and location works all the same. You can choose to rotate left 90 degrees or right 90 degrees; also you are able to flip the original file horizontally or vertically. Next, just set the aspect ratio to adjust the screen size, original resolution or crop size, 16:9 or 4:3 according to your own need. The “Synchronize(s)” is available to sync the video and audio.

Adjust crop area by drag-n-drop: drag the central and surrounding handles to adjust the crop area. You can drag the crop area to the position you want with left mouse.
Edit Video Image
You can adjust the “Speed”, “Volume”, “Brightness”, “Contrast” and “Saturation” of the video by dragging the sliders.

Add Watermarks
This is a new added function. From now on, you can add watermarks including images and texts freely. Click “…” and you can add images from your hard disk. Click “T” to input words, numbers, symbols, etc. Use “︿” and “﹀” to change the order the watermarks will show in the video if you add more than one watermark. The Size, Location and Transparency of the watermarks can be adjusted as you need.

Subtitle Setting
You can click “…” button to add external subtitile. After you import your subtitle file, you can set these options like “Font”, “Size”, “Effect”, “Color”, “Position” and “Subtitle Encoding” as you want. Or you can click “Search subtitle” button to look for the corresponding subtitle file from website. The very recent version added “Style” for your choice to make thre subtitle look more unique in the video. Adjust the “Transparency” and the “Location” by drag their respective slider. Click “Top”, “Middle” or “Bottom” button if you need an elaborate adjustment.

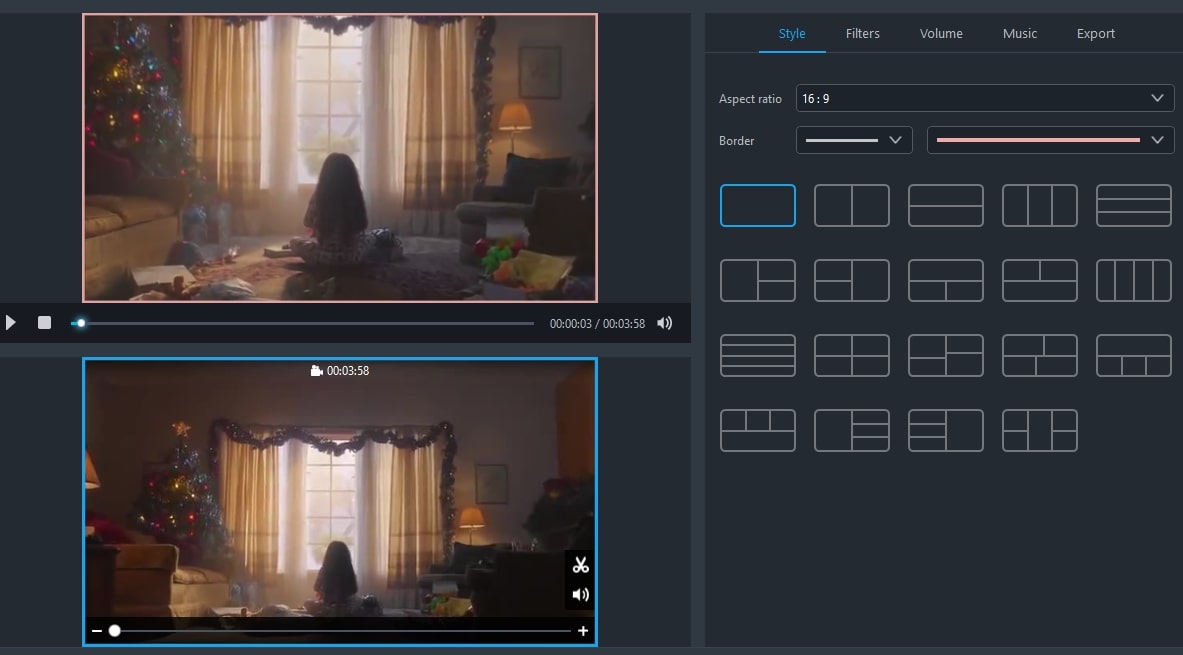
Split Screen
The recently released version 4.7.0 updated a new Split Screen feature in the software. Now you can easily create a split screen video. It has 18 split screen styles. You can put multiple videos on one screen, set the aspect ratio, modify the audio, add background music with just several clicks.
Under “Split Screen” tab, there are three sections over there. The top left section is the player window in which you can play and preview the video you make. The lower left section is the place to add videos. The number of windows will change with the split screen style you choose. The right section has four tabs: Styles, Audio, Music, and Export.
i
Add videos: select the style you want to use under the “Style” tab. Drop down “Aspect ratio” and choose 16:9, 4:3 or 1:1 from it. You will see the player window changes with the different aspect ratio.
ii
Click the “+” button to put the video in the corresponding window. Right click on the video and choose “Replace” to replace the video with another one; choose “Remove” to delete the current video from software.

iii
Click “Audio” tab, move the slider to adjust the volume. Check “Fade in and out” option to apply the audio effect.
iv
Click “Music” > “+ Add music” to add external background music for this video.

v
Select the size 480P, 720P or 1080P to save your video in.
MV Maker
This converting program also comes with a MV Maker which can help you make a fantastic video with video footages and photos. Before making an MV, check the layout of the functions first.
- The top left section is the player window in which you can play and preview the MV you make before you save it.
- The lower left section is the place to add pictures. After you add the pictures, all of them will display in this section.
- The right section includes 3 function tabs: Theme, Music and Export.
Click the “+ Add files” button or the “+” button and then choose the pictures/video footages to the program. Or you can also drag and drop them to the corresponding section. The files will be displayed immediately. You can go to adjust the order with the mouse after that. Move to the “Theme” tab at the right side of the interface, click the “Download” icon on the style you want to use. When it is fully downloaded, select it and it will be applied to the MV automatically. You can then preview the MV on the player. If you don’t like the default music, move to the “Music” tab, click the “+ Add music” to add another one you like, check the “Fade in and out” option if you want to use the audio effect for the music. When you are satisfied with the MV, go to the “Export” tab, choose the quality “480P”, “720P” or “1080P” and finally click the “Export” button to save the file.

Note: There are two icons shown on the video footage you uploaded. Click the scissors icon, you can cut out the unwanted parts; click the speaker icon and you can mute the video.
Media Player
The Converter has a built-in player, which is convenient for you to play the files and check the effects after your editing.
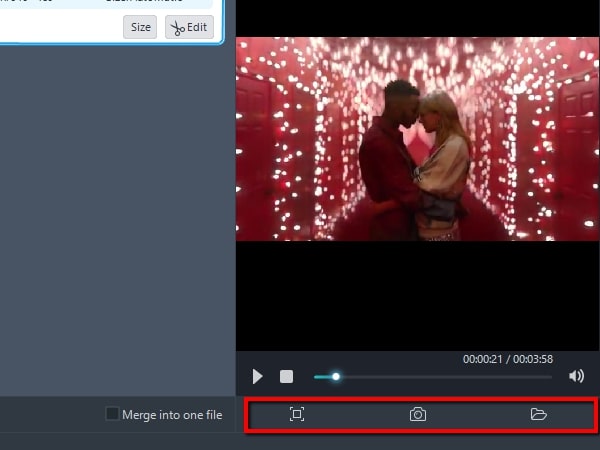
Click “Play” or “Stop” button to play the files, and you can adjust the volume freely. You can click Magnifier image to maximize the media player window and adjust volume, subtitle, and full screen respectively.

Tips:
Take Screenshot – The program supports taking snapshot at any time during preview to store your favorite video images. Please choose a video file in the file list, and click Play button in the preview window to play the video file. When it plays to the image you favor, click “Take Screenshot” button to store the current image in the snapshot folder. You can click “Open Folder” to open the snapshot folder.
How-to & Troubleshooting & FAQ
Please refer to the frequent asked question listed below to solve your problem before contacting our technical support.
Q: How to disable the audio or add additional audio in output file?
A: You just need to click the Audio Track button and select No audio to disable it or select Add audio… to add additional audio stream.

Q: How to get higher video quality?
A: The output video quality is decided by many factors, such as source file quality, output format, resolution, bit rate, frame rate, and so on.
If you don’t mind, please change another format for a try or make the values of resolution, bit rate and frame rate larger.
Note:
It takes longer time to convert a video if the parameters are larger. So to get a higher quality will slow down the conversion speed more or less.
Technical Support
Any time that you need help while using Apowersoft products, please contact our support team at support@apowersoft.com or submit your request via the online form, our customer service staff will give you a response within two (2) working days.
Leave a Comment