![]()
Communicating with students clearly comes in many forms. Some teachers always prepare lengthy lessons using bland visuals, or none at all. However, the repeated old, plain, boring lecture can get everyone in the class tired and sleepy. Being less attentive in class could also hurt the learning capabilities and interest of the students. Thankfully, putting extra excitement in class is made easy by recording class lectures and it has been accepted by more and more people. With just one computer and recording software, an educator will be able to record an interesting lesson and save the video for further use, which is much more convenient for both teachers and students.

Undoubtedly, having the best recorder for lectures will make this a lot easier to do. Apowersoft Screen Recorder allows users to record any class lectures with high quality and capture images for free. With it, you are capable of recording classes just in a few of clicks.
How to Record Class Lectures with Ease
I. Record class lectures using online application
For most users, Apowersoft Free Online Screen Recorder should be the first choice. It is a web-based application which enable users to capture their screen activity along with audio from system and microphone, both in HD quality. Simply go to its official webpage and activate the application by clicking on the “Start Recording” button. For the first-time visit, it will ask to download a launcher to your desktop. After installation you can utilize it without any limitation. Just preset some related settings and you can start recording soon.

It does not matter if you are using Mac or Windows as the software works perfectly with both platforms. The software is so smart that it automatically determines which OS you are using and will pop up the screen recorder that is compatible with it.

But if you do not want to load the program on webpage every time, you may consider using its desktop version. It’s more convenient to use, you can make screencast at any time you want. Absolutely, it also offers Windows and Mac version. More details about them are as follow.
II.Record Lectures on Windows and Mac with ApowerREC
Documenting lectures come handy especially when teaching multiple classes. Aside from making sure that the recorded class lectures is vivid, you can also save a lot of time in preparing for each class when you already have a recorded video of the lecture at hand. For proctors using Windows or Mac OS devices, the most efficient way to save a copy of your presentation is by using a notable tool called ApowerREC. This application can help you save your lectures via screen recording. In fact it can record screen and audio simultaneously, plus it can capture webcam and microphone feeds as well. Other functions that you can expect from this program include, basic annotations, screenshot capabilities, task scheduler, and direct sharing to well known social media sites.
Here’s how to record lectures via its Windows version.
1
You need to get and install this recorder for you to utilize it.
Download
2
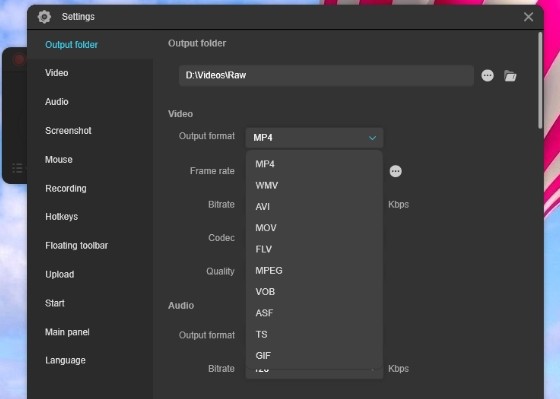
After installing the desktop version, adjust the settings according to your preferences. You can change the source of audio between the PC system and the microphone, or decide on what file format and where you want the video to be saved in. And make sure that webcam recording is enabled.
3
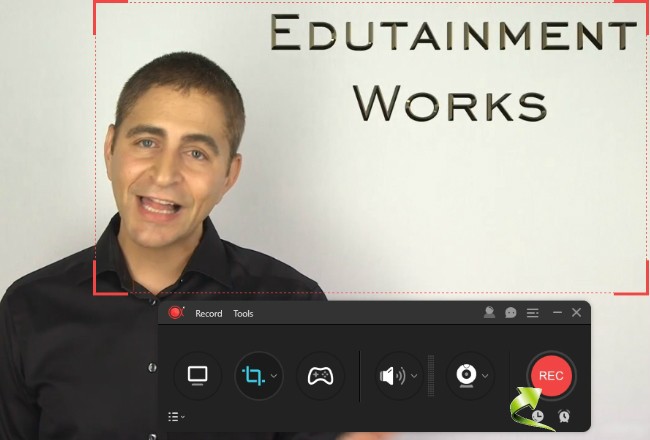
Prepare to take a video of yourself using a webcam while teaching. Make sure to place the webcam at the back section of the room so that it will give a clear shot of you and everything that you demonstrate while you complete your lecture. For grabbing your screen activities simply set the recording mode that you prefer to use.
4
Next is to hit the “Record” button, it is marked with a red dot so you can’t miss it. Once you start recording, all activities on your screen and webcam footage will be recorded into a video along with a clear audio.
5
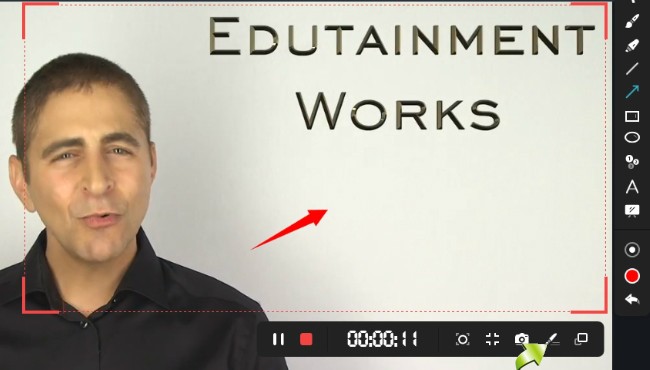
If like you can add annotations by hitting the “Pen-like” icon.
6
Once you’re done, just click “Stop” and your recorded lectures will be ready in no time.

Meanwhile, here’s the best way to record lectures on Mac which you can adopt, by doing the following.
1
Simply install this program from the download link provided.
2
Go to “Settings” to make some needed configurations. Be sure to enable audio and microphone recording. You can also adjust the audio input from the main recording toolbar together with the webcam recording.
3
For solo webcam recording, make sure that you have adequate lighting. While for screen recording, just choose the recording mode that you like to use.
4
To start the recording, hit the “REC” function and it will roll instantly. At this point, you can opt to add annotations like lines, shapes, texts, if you like.
5
After the capturing process, hit “Stop” and the copied lecture will be included on this lecture recording software’s media list.
It is quite interesting to note that a video lecture is more entertaining than the usual lectures. With videos, you can play around with the effects, so you get to incorporate into more features on the lecture. Lastly, it is easier to document your classes when you record class lectures. Teachers can upload to their personal space in school site where the students can access all recorded lectures. This is the perfect way to have the students study their lessons. It will be also be convenient for them to review the lecture after class to enhance their impressions.

Leave a Comment