ApowerManager is a mobile manager program which works excellently on Android and iOS devices. Recently, it has been updated to V3.0. When you open it, you will experience that a lot of differences have been made: more beautiful interface, more straightforward instructions, more additional functions, and more user-friendly settings. Since it modifies in many places, here we will explain in details about how it works.
How to Use ApowerManager
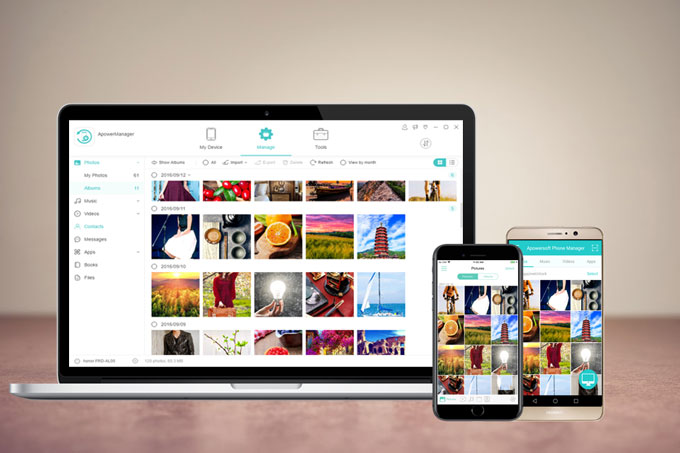
1. Download
Install the program on your Windows PC or Mac as well as your mobile device.
For PC:
For mobile device:
2. Connection

On the main interface, you can see two options on the right side of the program, one shows a USB icon and the other shows a Wi-Fi icon. Below are how to use them.
USB Connection
- Before the connection, Android users need to ensure that you turn on the USB debugging. And iOS users need to sync your device to iTunes.
- Use a USB cable to link your mobile device with the computer.
- During the connection, Android users need to set USB for MTP or PTP and allow USB debugging in the pop-up window, while iOS users need to tap “Trust” to enable the connection.

Wi-Fi Connection
For iOS users
- Connect your iOS device and Windows PC or Mac to the same network.
- Connect your mobile device to your PC with a USB cable, open the iTunes on your PC, click the device icon, go to “Summary” to check the boxes beside “Sync with this iPhone over Wi-Fi” and “Manually manage music and videos”, and click “Apply”. After that, close iTunes.
![Set iTunes]()
- Open ApowerManager, connect your iDevice with the computer via USB connection, and turn on “Advanced Wi-Fi connection”.
![enable wifi connection]()
- After this, close the program and next time you run the program, it will automatically connect your phone to PC.


Note: Once you successfully enable Wi-Fi connection for your iDevices, it will work preferentially even when you connect via USB cable. And if you only want to use USB connection method, you can turn off “Advanced WiFi connection”, restart the program and then link your phone with the computer.
For Android users
- On the desktop program, click the Wi-Fi icon and you will see a QR code.
![Android WiFi Connection]()
- Make sure your phone and PC are under the same network.
- Tap on the link button on mobile app and choose the computer icon. Hit “Scan” to scan the QR code on the desktop screen.


Tip:
If you want to manage more than one mobile, you can directly connect using USB cable. And if you want to connect more than one device through Wi-Fi, just click the plus icon on the lower left side of the program beside your device name. You can also click the upward button to see the connected phones and choose the mobile to manage.

3. Functions
Import, Export, Delete Files
Click the “Manage” button on the main interface in order to see all the file tabs and start managing your mobile data.
Import Files
- Go to a certain tab, click “Import”, where in the dropdown menu you can choose “Import File” or “Import Folder”.
![Click Import]()
- There will be a window popping up, locate the files or folder you want to transfer to your mobile, and click “OK”.
- Then you will see the transfer process from the transfer icon on the upper right corner. And when it finishes transferring, you will see a notification at the upper right of the program emerging.
![Check Process]()


Tip:
To import files or folders, you can also go to a tab > choose file(s) or folder(s) > drag and drop them to the tab.
Export Files
- Click on a file category and choose one or multiple files.
- Click “Export” and you can select a place to store the files.
- The exporting process can also be checked via the transfer icon on the top right of the program. When the transfer completed, the notification will be shown on the upper right corner and you can click the folder icon on the notification to view your files.

Delete Files
- Similarly to the method above, you need to click a tab and choose the unwanted files.
- Click “Delete” and confirm your decision, and the files will be erased from your mobile devices.

View Files
With ApowerManager, you can not only transfer and delete your data, but also view the files from the program.
Pictures:
- Go to “Photos” tab and put your mouse on an image.
- Click the eye icon or double click the picture to view it.
![Click Eye Button]()
- You can zoom in or out to view the photos, click “Next” or “Previous” to see other images, set the gallery as a slide to play your photos, and rotate your images to view them.
![View Photos]()


Note: If you want to view the pictures you captured, you should go to “My Photos” and if you want to see other photos, just click “Albums” and then “Show Albums” and go to a certain folder to view the pictures.

Music:
- Click “Music”, go to “My Music” or other folders.
- Double click on the music to play it on the computer or hit the play icon on the cover of a certain song.
![Play a Song]()
- When you play the music, you can click the button at the bottom to choose the play mode: repeat all songs, repeat one song or shuffle. Click “Next” or “Previous” button to change the song.
![Music player]()


Videos:
- Go to “Videos” and then “Albums”.
- Click the play icon or double click to play the video.
![Play a Video]()
- While playing the video, you can click the full screen button to view the video in a bigger size. Click the progress bar to adjust the progress. You can also click the volume button to adjust the volume.
![Video Player]()


Books:
- Go to “Books”, click “Show booklists” and find a certain type of books you want to view.
- Navigate your mouse over the document or book, double click on it or hit the eye icon.

Organize Files
Create a Playlist (for iOS Only)
iDevice owners now can create playlists and add their favorite music to the playlists , follow the steps below to learn how:
- Go to “Music” tab, find “Playlists” and click on “Show Playlists”.
![playlist]()
- Click “Add Playlist”, give a name to your playlist and hit “OK”.
![add playlist]()
- After that, click “Import” to move your favorite songs from Windows PC or Mac to the playlist.
![import music]()
- Go to “Music” tab, choose songs, and click “Add to” to add these songs to a playlist.
![Add to Playlist]()


Add a Contact
- Go to “Contacts” tab, and click “Add”.
![Add a Contact]()
- Enter the name and other important information of the contact. You can also hit the pencil icon to add an avatar to visualize this contact. After this, click “Save”.
![Save a New Contact]()


Edit a Contact
For the contacts already stored out on your phone, you can edit more details with the steps below.
- Under “Contacts”, select a contact and you will see the information on the right part of program.
- Click the pencil like button, you can add a portrait for him or her, add phone number, address, email, etc. And you can put this contact to one or more groups.

Add a Contact Group
- Inside “Contacts”, click on “Show group”.
- At the bottom of the groups, you will see an “Add Group” option, hit it.
- Input a name for the group and click the “OK” button.

Add a Note or a Bookmark (for iOS Only)
- Click the “Notes” tab and then “Notes” or “Bookmarks” folder.
- Click the “Add” button and type the content. Hit “Save”.

Edit a Note or a Bookmark (for iOS Only)
- Go to “Notes” or “Bookmarks” under the “Notes” tab.
- Choose one note or bookmark, and click “Edit” to modify the content. Once done, click “Save”.

Install an App
- Go to “Apps” and then to “Installed”.
- Click the “Install” button to move an app into your mobile.
Note: Due to iOS restriction, the devices with iOS 9 or later cannot install the app directly via the program.

Uninstall an App
- Again you can find the “Installed” folder under “Apps”.
- Select the app, click “Uninstall” and choose “Yes” to confirm your decision. Also you can directly click the trash bin icon under “Operation” bar to uninstall the app.

Backup and Restore
Backup
- Click “Tools” on the program, and then find “Backup & Restore” under the “Utility tools”.
![Backup and Restore]()
- Choose “Full Backup”, select a place to store the backup.
![Full Backup]()
- Click “Backup” to start the backup process and wait until it completes.
![Enable Backup]()


Restore
- Still on “Backup & Restore” tool, choose “Full Restore”. It will display all the backups.
- You can click the “Add backups” option to import other backups or just check the existed backup.
- Click “Restore” to get them back to your mobile.

Screen Mirroring
On the main interface of the program, you will see a mobile frame, which display the content of your mobile. You can take screenshot and cast phone screen with the buttons under the frame.
- Click the second button “Reflect” and you can display your mobile screen in real time.
![Click Reflect]()
- Click the image icon, you can choose “Copy to clipboard” to copy the current image, or “Save to local drive” to take a screenshot of your phone. Hit “Open screenshot directory” and you can see the screenshots.
![Take a Screenshot]()
- Click the full-screen button beneath the displayed screen, so it will enable you to view your phone content in a larger size.
![Full Size]()
- Click the rotate icon to rotate the direction of your displayed screen.
![Rotate Screen]()


Send Messages (for Android Only)
Sending text messages is only available for Android users. And below are how to send SMS to others from the computer:
Option 1:
- Go to “Contacts” and go to the search bar to find your receiver.
- Click the message icon and edit your content. Click on “Send” in order to send a message.

Option 2:
- Go to “Messages” and use the search bar to find your receiver.
- Enter the content on the input field and click on the “Send” button.

Option 3:
- On “Messages” tab, click “Add”.
- Click the plus icon to add contact. Also you can add a group.
- Type the content and click “Send”.

4. FAQ
In daily operation, you may also encounter other issues, to help you better enjoy the program, you can find more solutions in our FAQ category. And welcome you to join the discussions about the program in our community.
Leave a Comment