WAV is an audio format which is perfect for recording and sampling audio with high quality. Furthermore, this format is able to keep the original quality of audio recordings. On the other hand, due to the high quality of WAV format, the file size is also larger than that which is compressed like MP3. What’s more, WAV files cannot be recognized by most devices. With that being said, people are finding ways on converting WAV files to compressed format.
Best WAV File Compressors
With different software, you can do this job in different ways. Check the tutorial to find the suitable way.
1. Streaming Audio Recorder
The main function of Streaming Audio Recorder is to record audio and download music. Furthermore, this application can as well convert recorded files into a wide range of formats. This just means that it can convert or compress a WAV file into other formats like MP3 or WMA. In addition to this, this amazing application can also lets you cut unwanted parts, remove silent parts, and save it in a low quality, so as to achieve smaller file sizer.
It works well on Windows and Mac. To know more about these functions, see the steps below. Please download and install this program at first.
a. Record WAV file
- Enter “Settings” menu and go to the “Record settings” tab.
- Choose the “Output Format” as MP3 or WMA, the bitrate should be set as “192kbps” or even lower. You have to balance the quality and file size compression.
- Click on “OK” to save the setting.
- Play the WAV file to start record it. Click on “Record” tab and the “On” button. Later, click “Off” after the recording.
- Press “Open folder” to find the audio and play it as you want.

b. Edit WAV file
By trimming your audio track, you can get a shorter file, and the size also will be reduced.
- Select “Audio Editor” from the drop down menu of “Tools”. The sleek editor interface will show up.
- Click on “Load an audio file to edit” icon found on the upper part of the tool.
- Choose the WAV file to edit and click “Open”.
- Play the audio, then select the useless parts and silent parts. Click “Edit” – “Cut” to remove them.
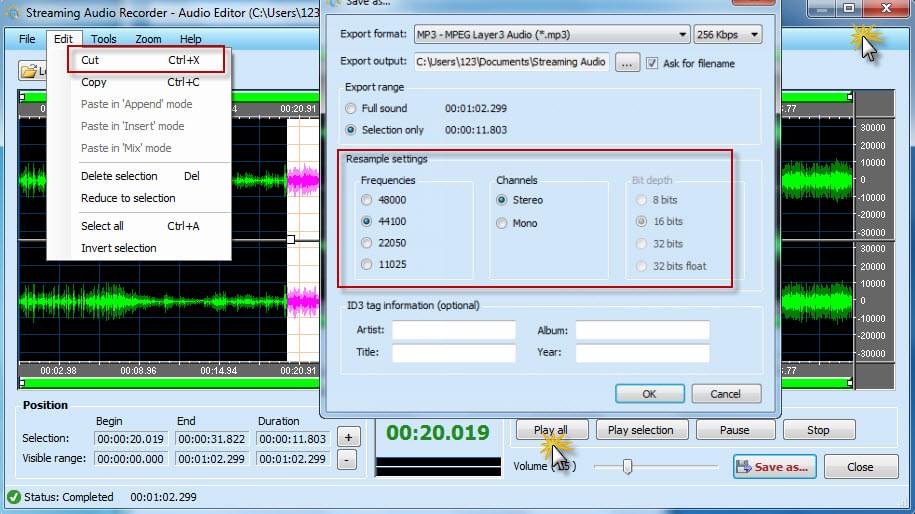
- Once done with the editing, click on “Save as” icon at the bottom of the windows and another window will pop up.
- Choose the target format, bitrate, channel, Bit depth and etc. Hit “OK” to save the file to hard drive. Lower the bitrate will also result in audio with smaller size.
c. Convert WAV to MP3 or WMA
- Launch the application and click on “Tools”.
- Choose “Audio Converter”. A new window will pop-up, showing the built-in converter of the tool.
- On the audio converter window, click on “Add” in order to add the WAV file to convert.
- Choose the file format “MP3” or “WMA” in the “Format” section.
- Click on “Start” button which is placed on the right corner of the audio converter window to compress WAV file by converting it.

2. WavPack Audio Compressor
WavPack Audio Compressor is a WAV file compressor tool. Audio file must be uncompressed PCM when using this tool. Aside from that, files must also be mono, stereo or multichannel and they can be in any resolution from 8-12 bits. It has a loseless mode which guarantees you to compress WAV without affecting the quality. To use it, you just need to import the audio file, then compress it by following the instructions.

The tool is compatible with all the operating systems. It is claimed to be free. However, before users can download this tool, they first need to donate some money for the continuous development of the tool.
These two tools are both great in compressing WAV files. However, the first tool gives simpler and more flexible ways to complete the task. WavPack Compressor provides professional capability by it solely works for compressing audios only. According to your requirement and habit, select the desired one for yourself.

Leave a Comment